


Welcome to the world of rigging, a skill in itself and one that can transform the performance of your sail and thus overall enjoyment.
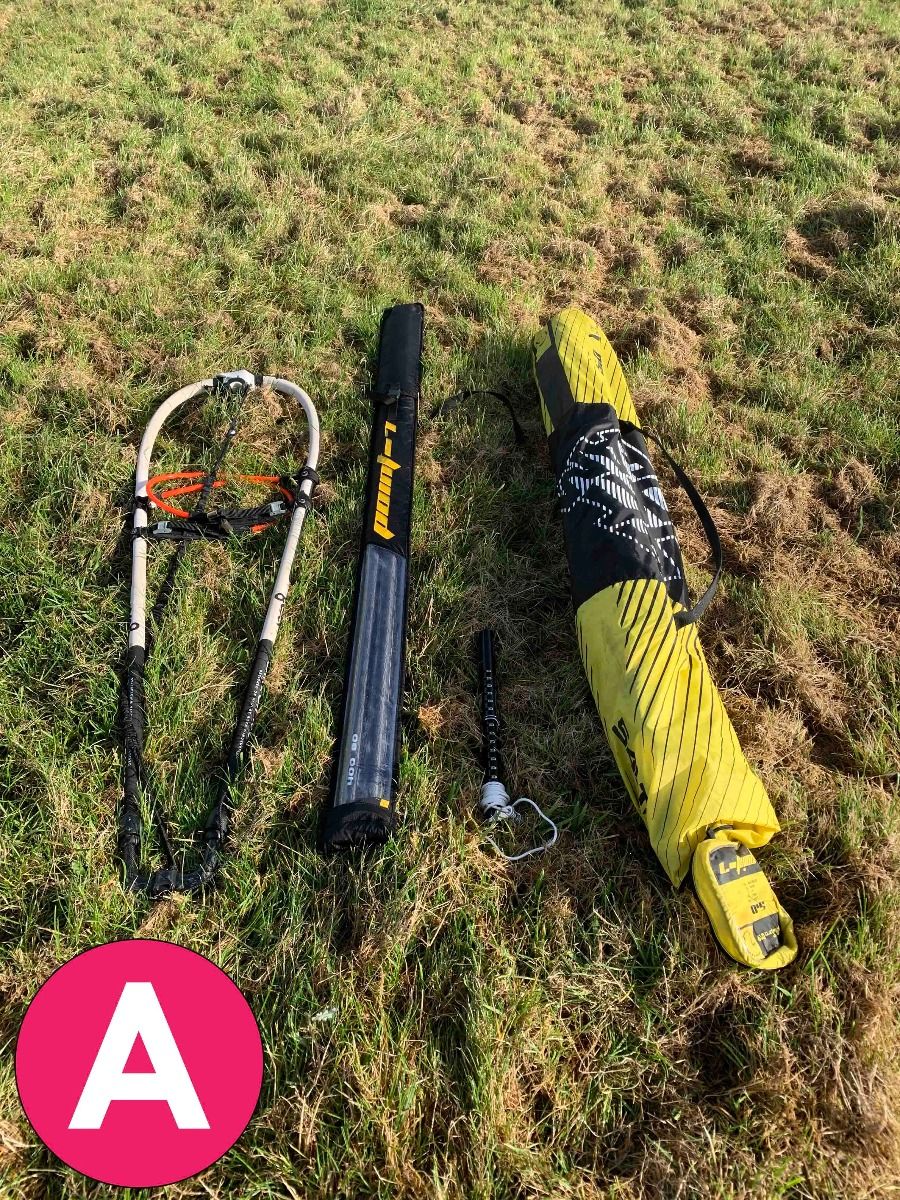
Equipment Required (Img. A)
A: Boom
B: Mast
C: Extension
D: Sail
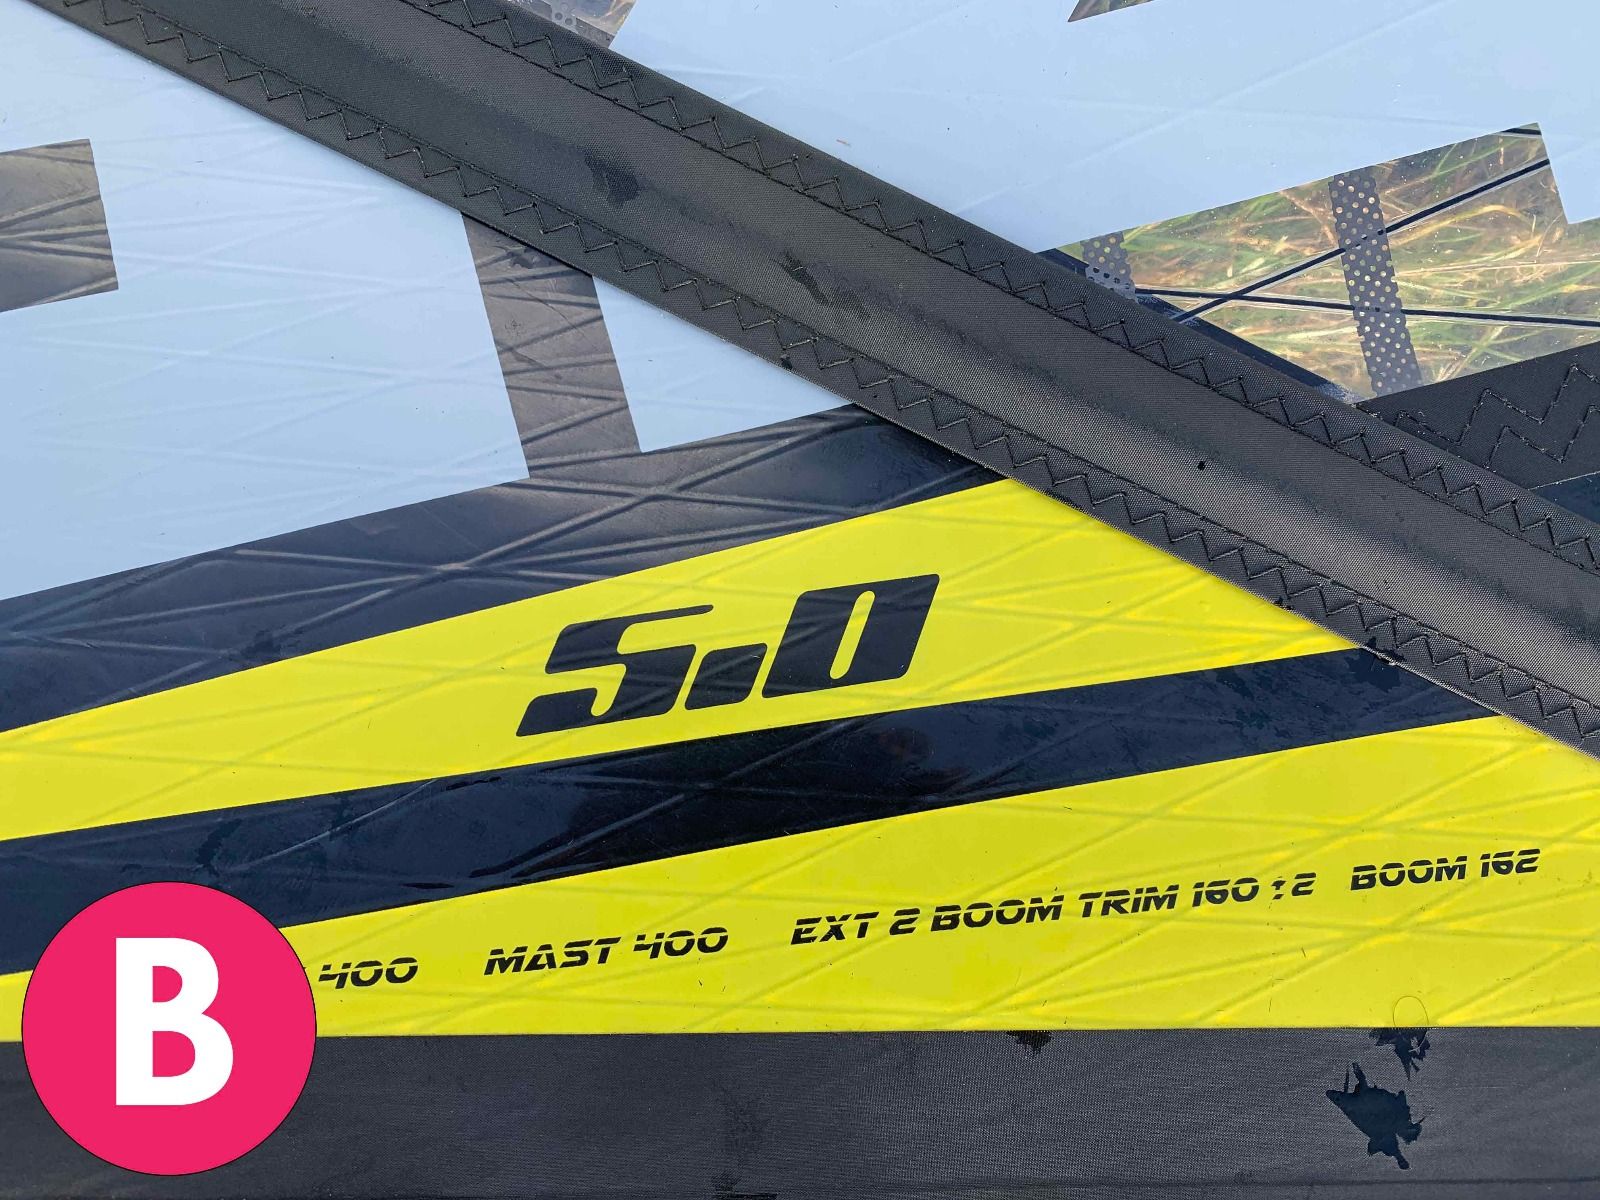
Every sail has its own rigging requirements and these are usually listed on the top of the sail bag, as well as the bottom of the sail itself (Img. B). Our website includes spec sheets for each model and size, so check you have complimentary masts and booms prior to purchase. It’s very important to follow the dimensions as much as possible to get the best trimming and resulting performance.
STAGE 1 – Unrolling the sail
When unrolling the sail make sure that the wind is on your back. This makes the process easier and also reduces the potential of damage caused by the sail flapping, which results in abrasion against hard surfaces.
STAGE 2 – Connecting the mast / threading into the luff
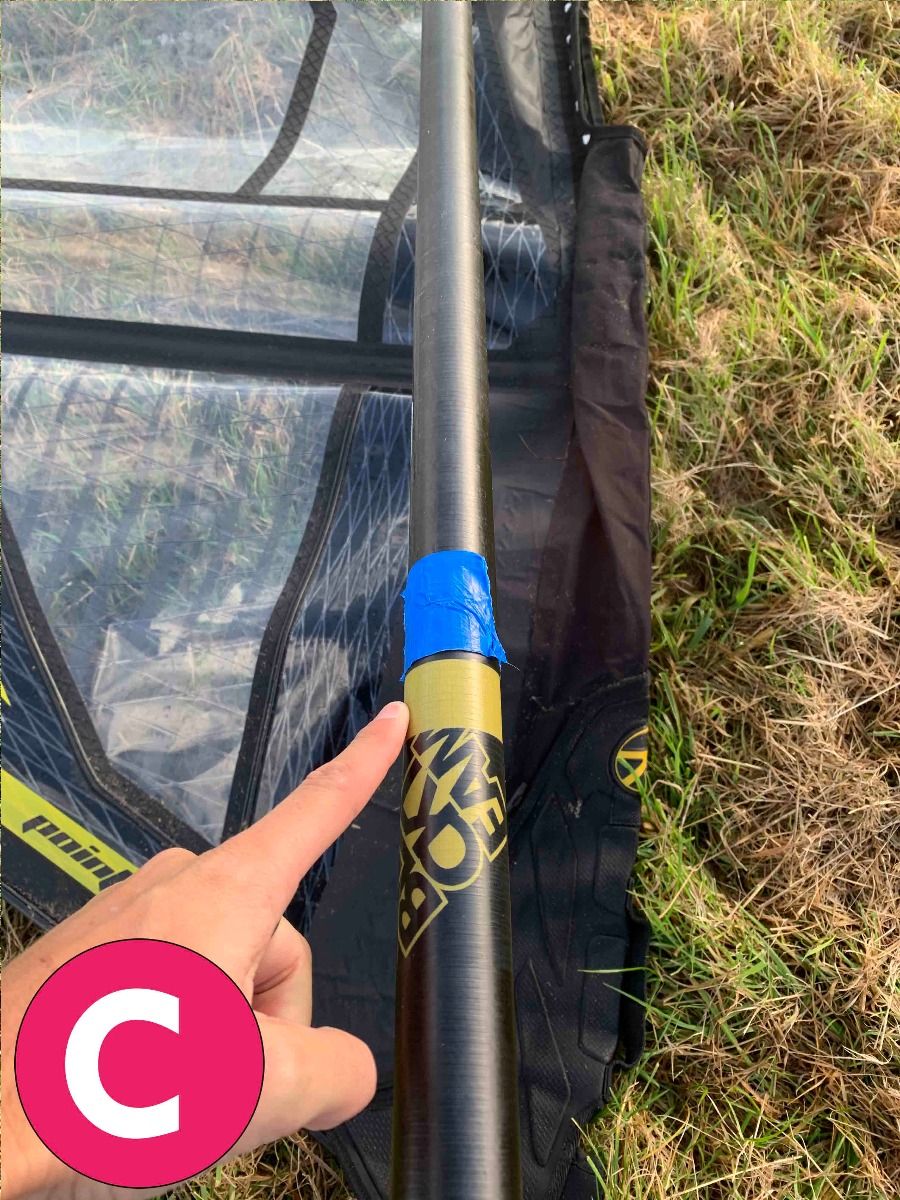
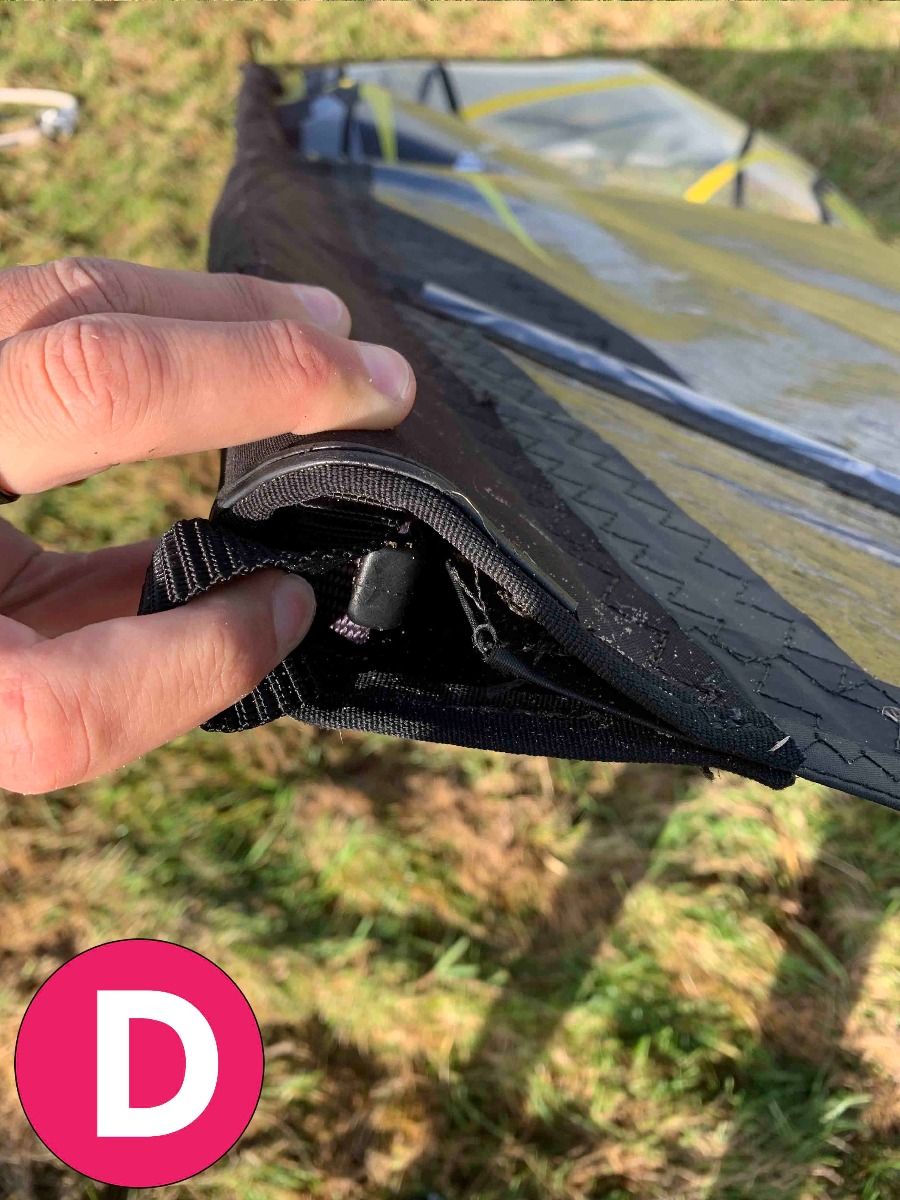
When connecting the top and bottom sections of the mast it is imperative that the two fit perfectly together. Over the years we have seen many instances of masts being damaged where the two halves are not fully connected, leading to weakness when you downhaul. The tension during this phase is massive and in some cases incorrectly connected masts can snap at the joint. It is a useful piece of advice to place some tape around the connection to eliminate this risk as no brand will warranty this damage (Img. C). Gaffer or electrical tape would be our recommendation. Once complete you are ready to thread the mast into the luff pocket, locating the top of the sail into the mast cap once fully inserted (Img. D).
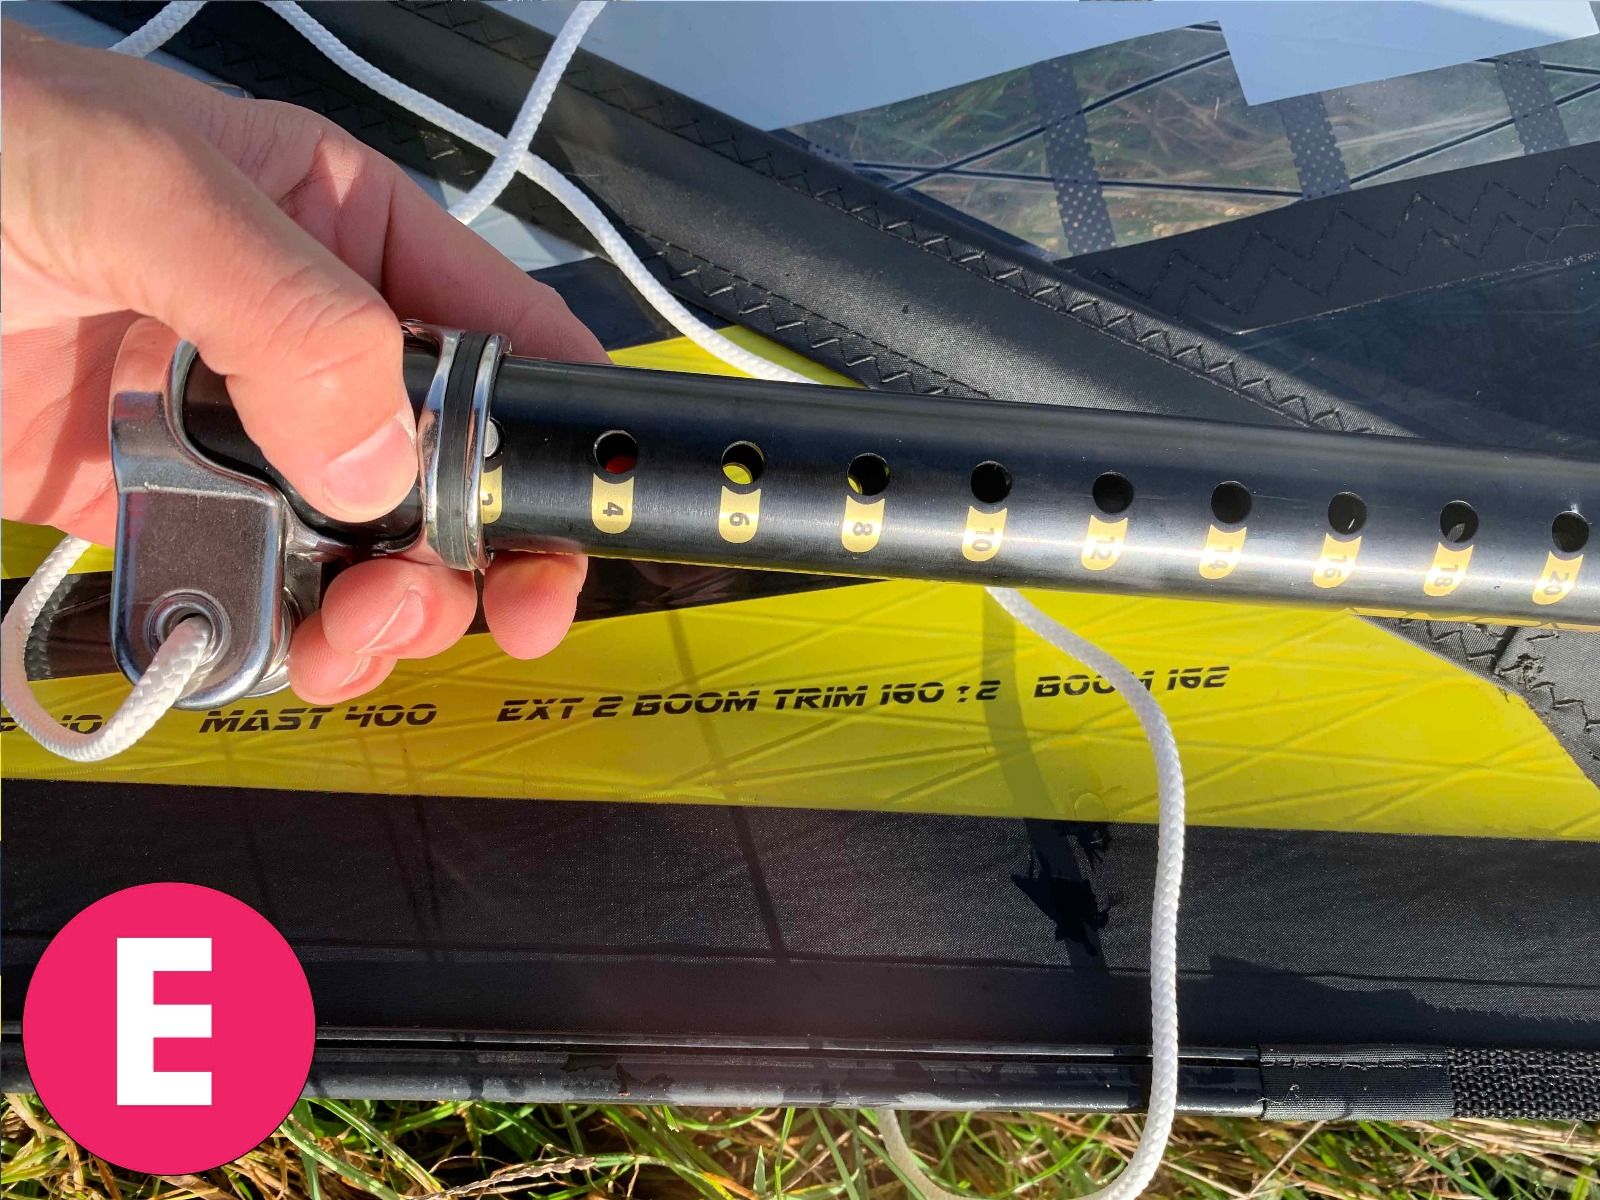
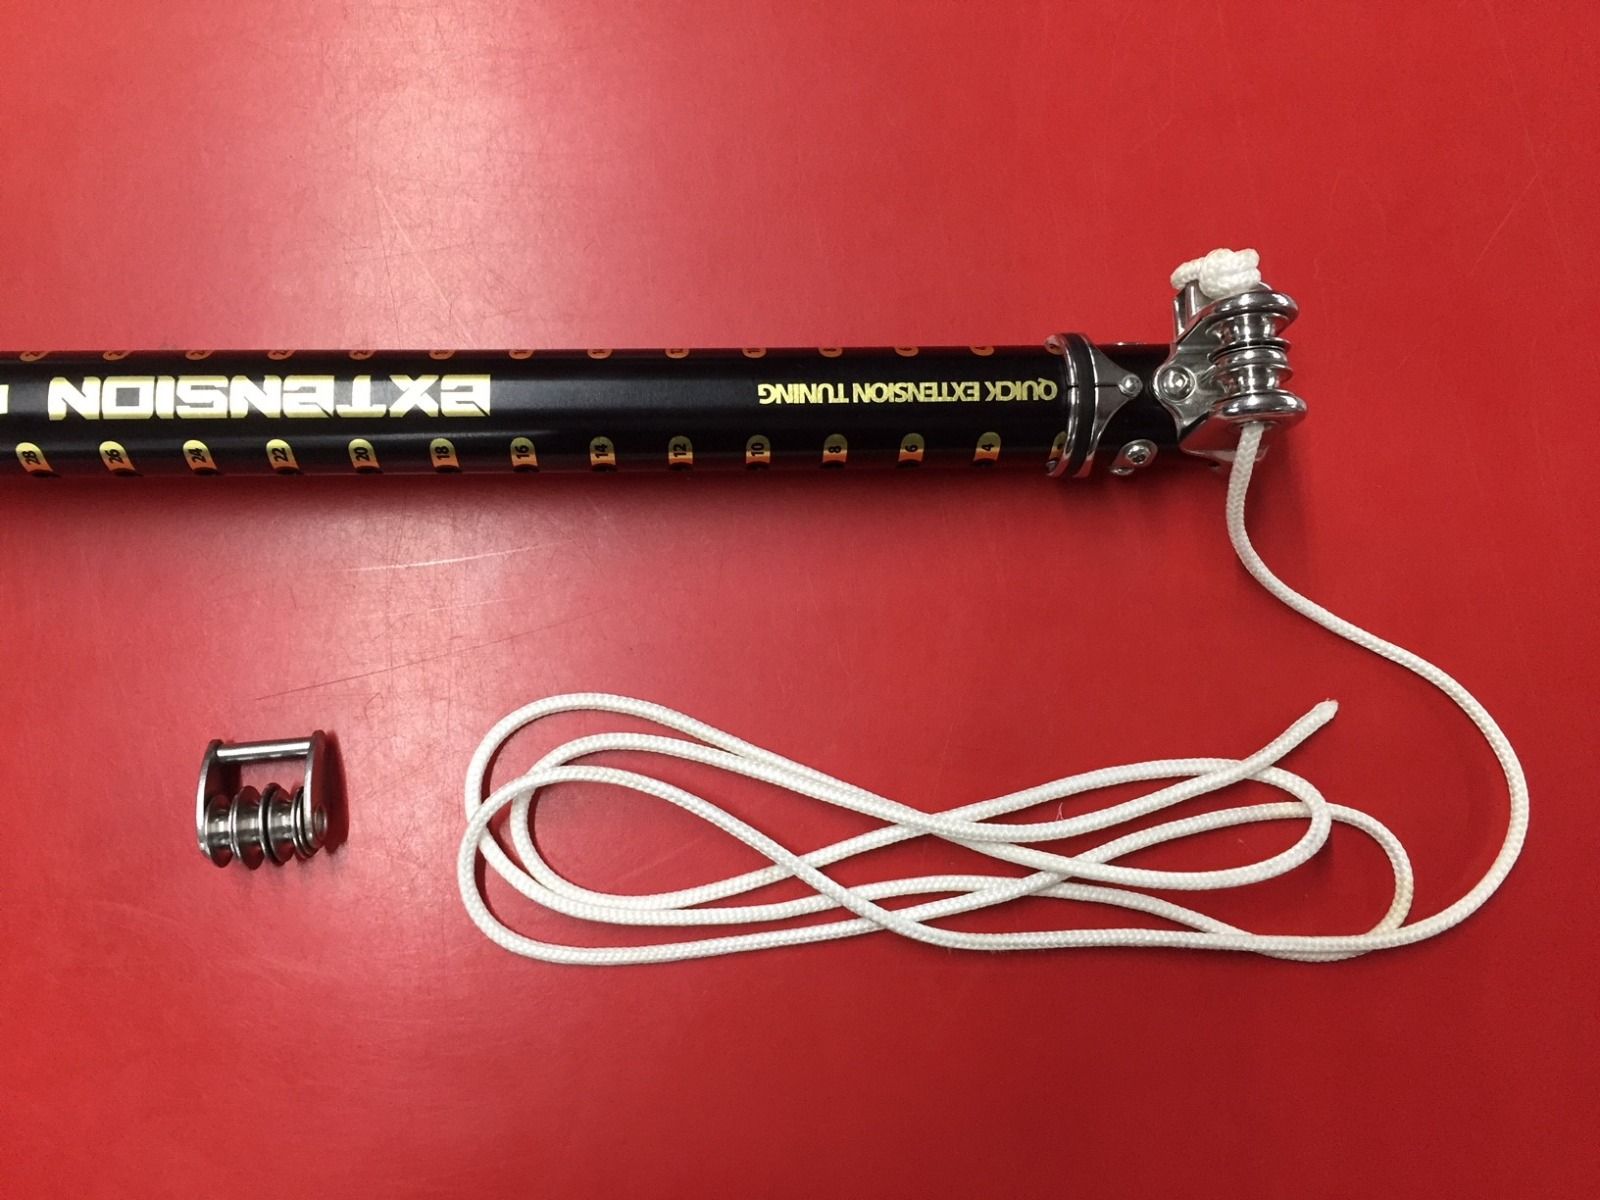
Stage 3 – The Extension
The extension acts as a connection between mast and base. Its adjustability aims to reduce the number of masts required to complete your quiver. Without their development it would be necessary to have a complimentary mast for each sail size. Sounds expensive! Firstly, ensure that the extension ring has been placed at the correct level (Img. E). Your mast will be shorter than the sail luff length as outlined in the specification and thus set the extension ring at a level that allows the two to match.
e.g. 2020 Goya Banzai 4.5
Luff Length - 393cm
Recommended Mast - 370cm
Required Extension - 23cm
When you have set the extension length using the ring it is time to insert it into the mast.
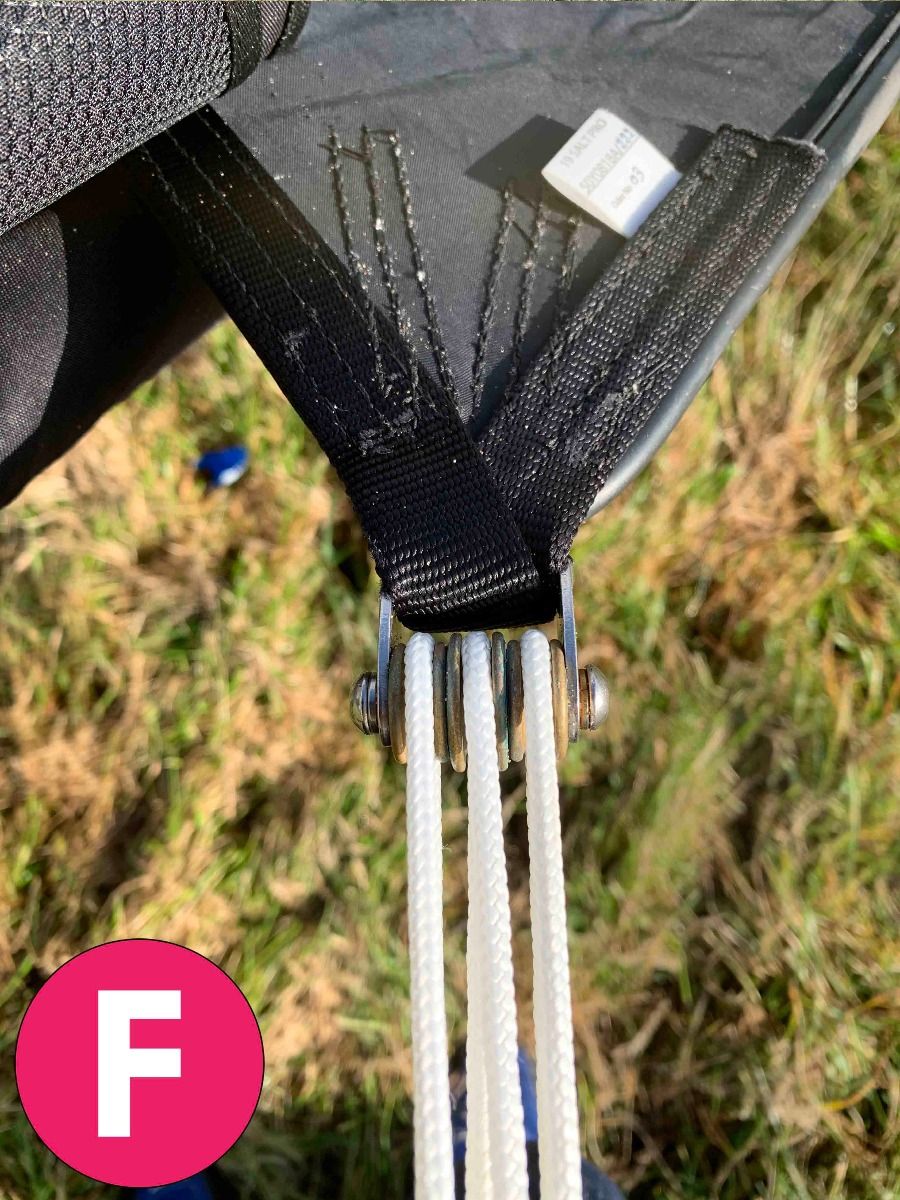
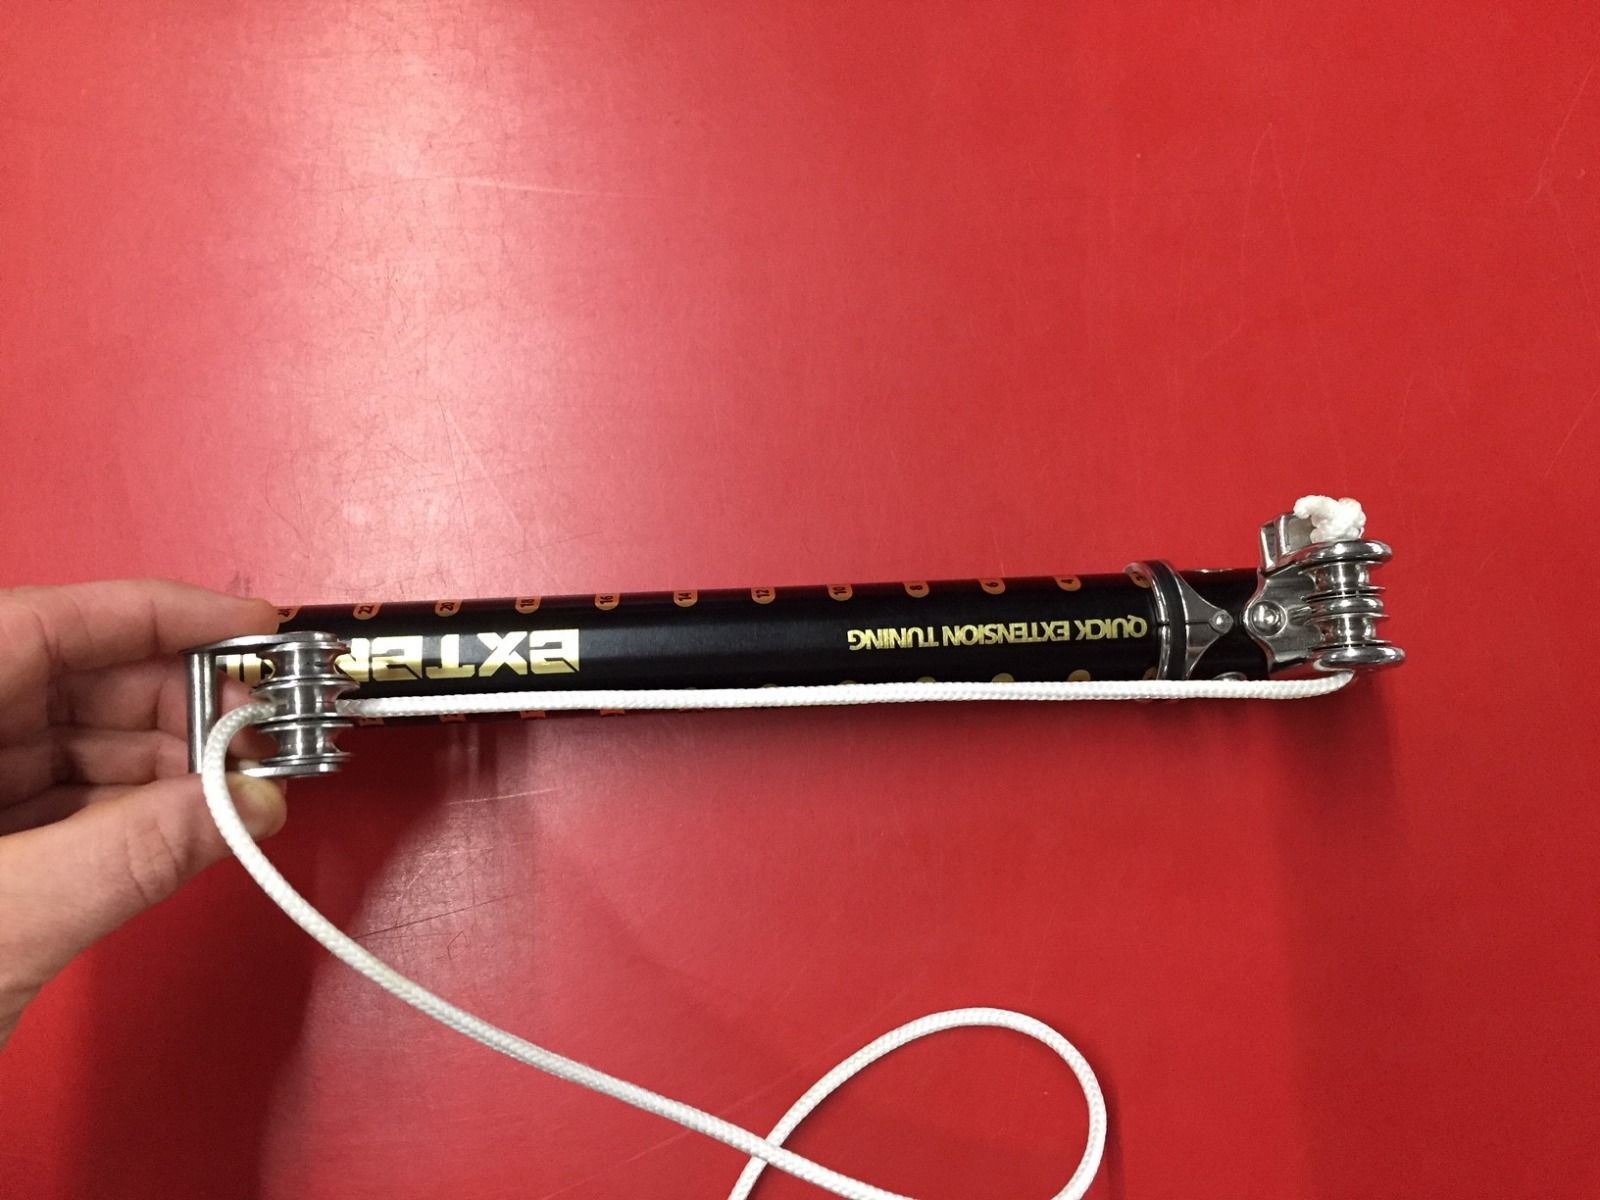
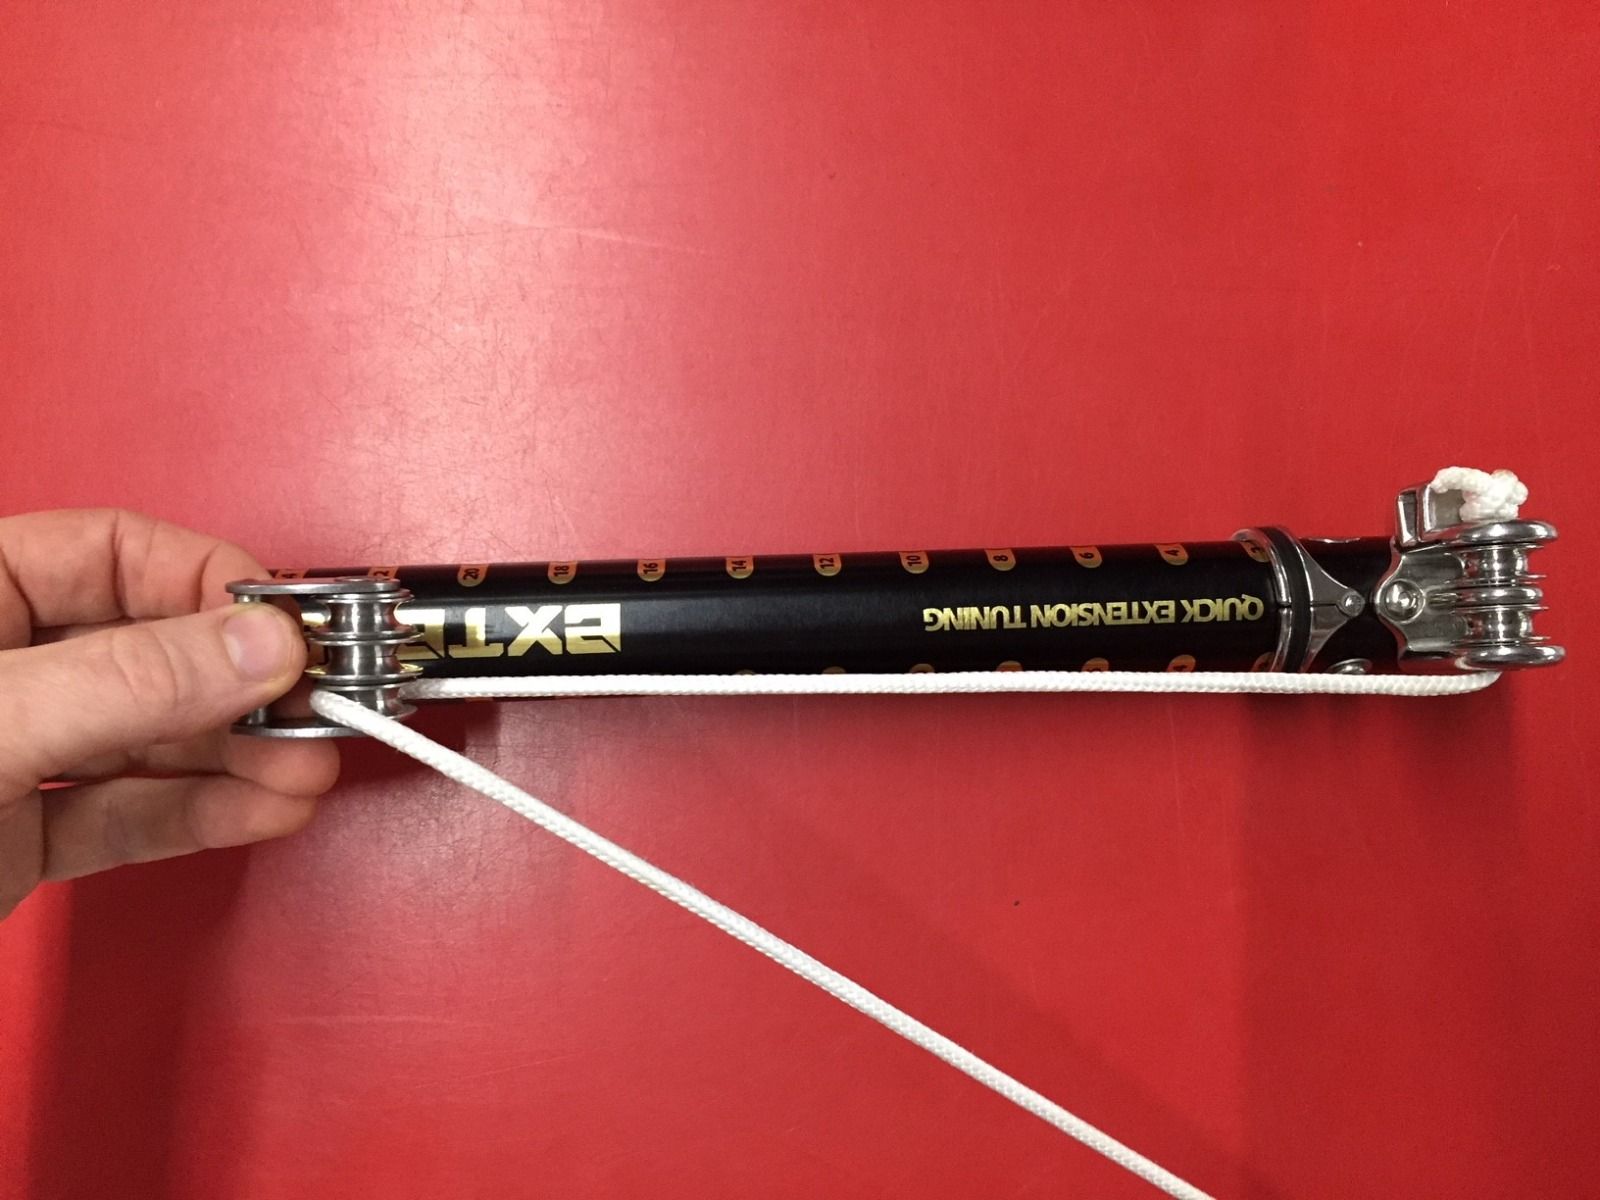
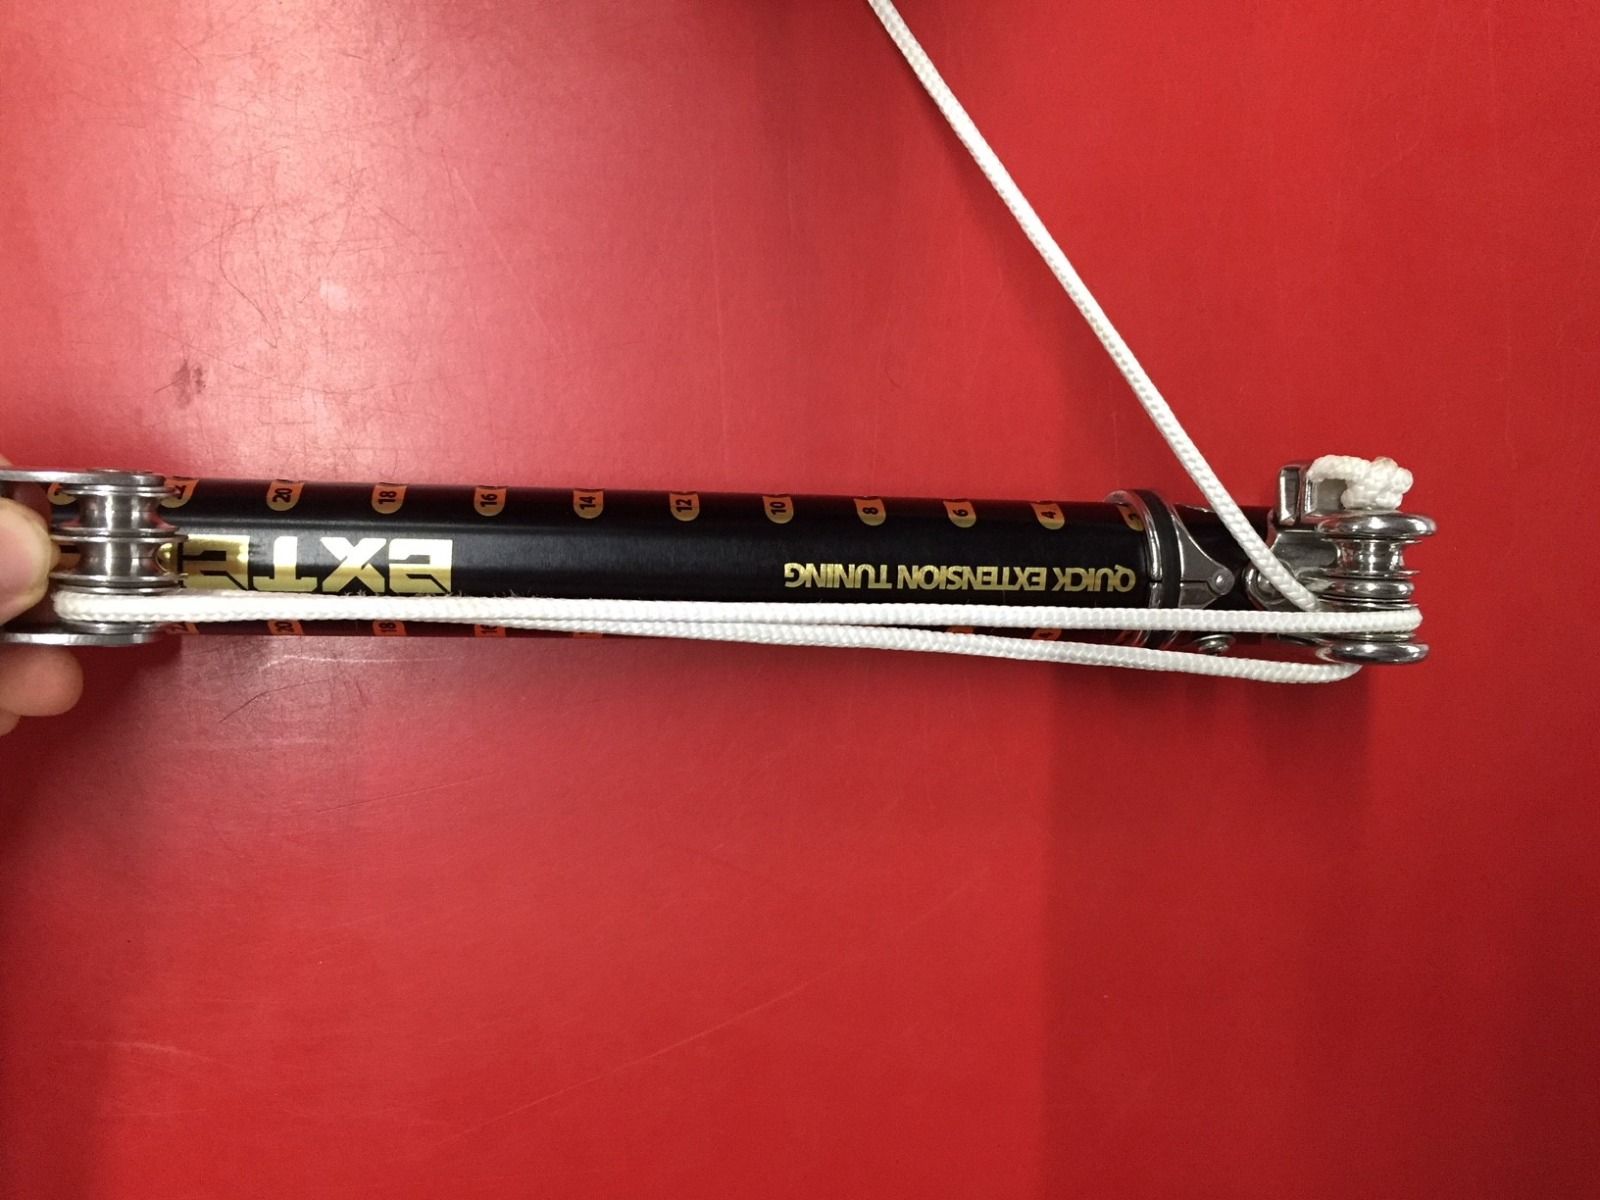
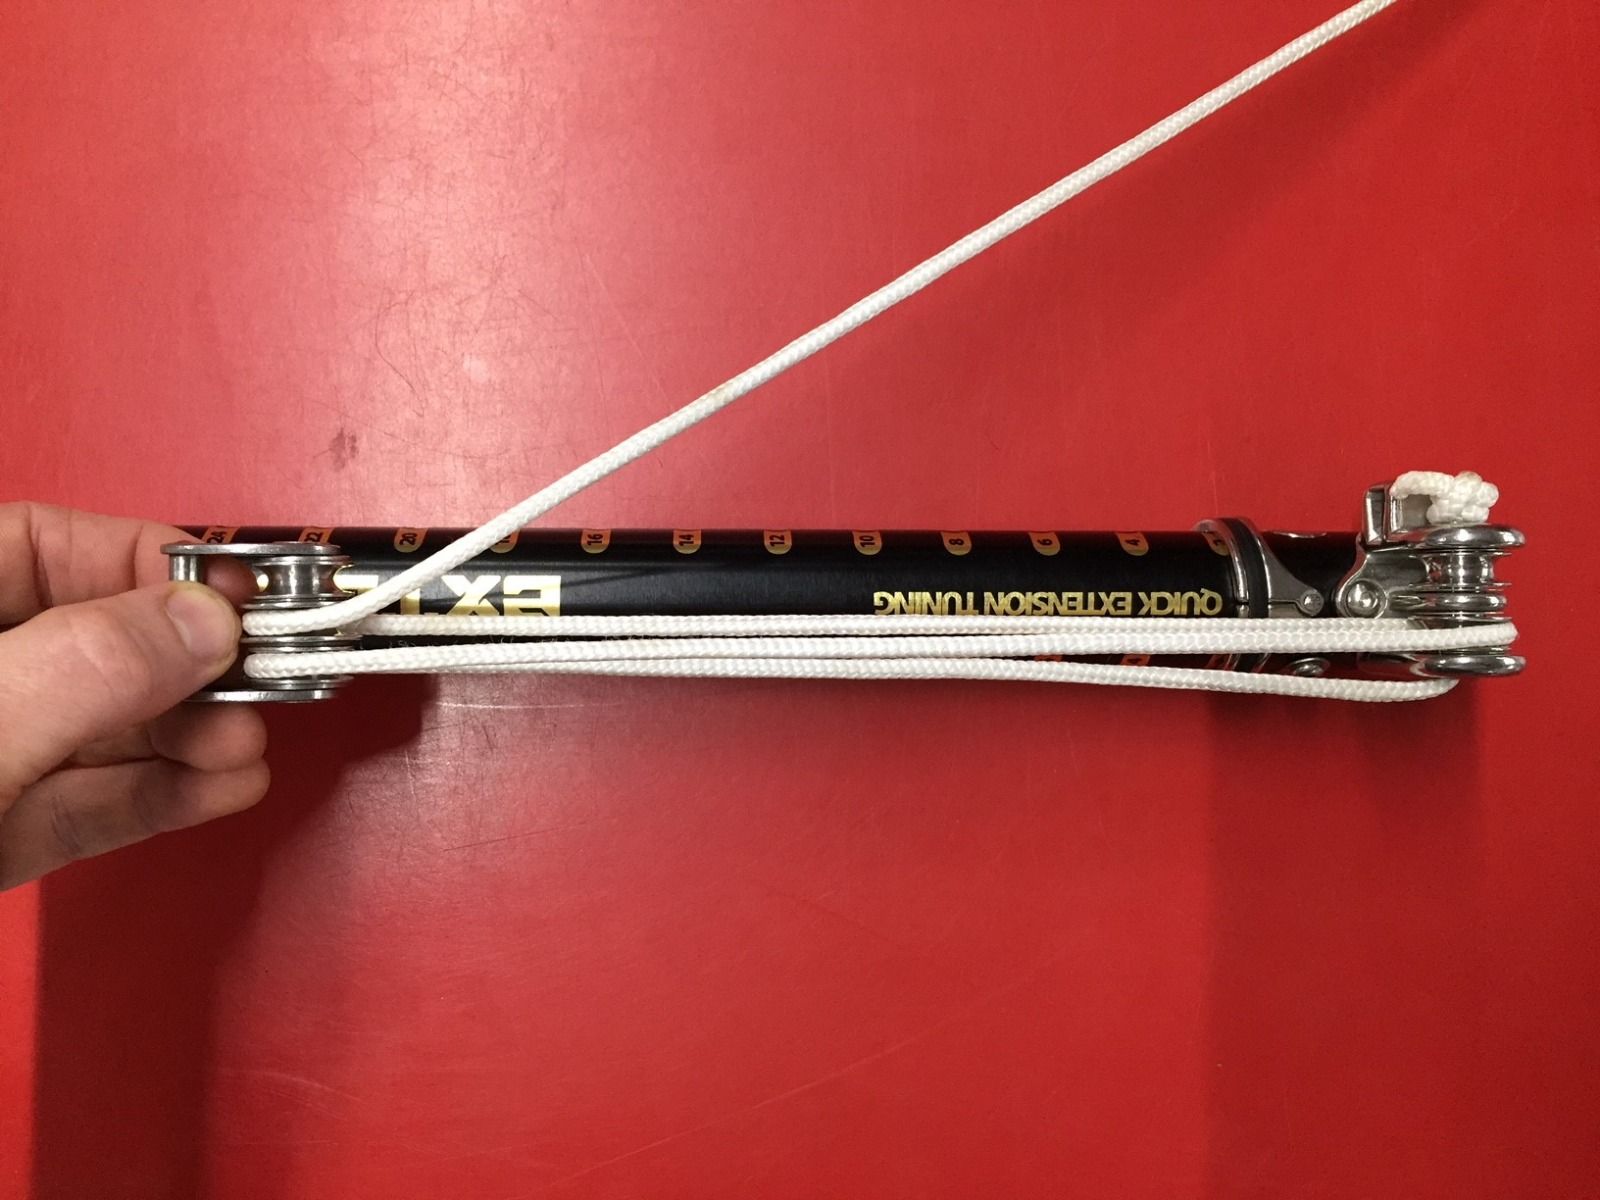
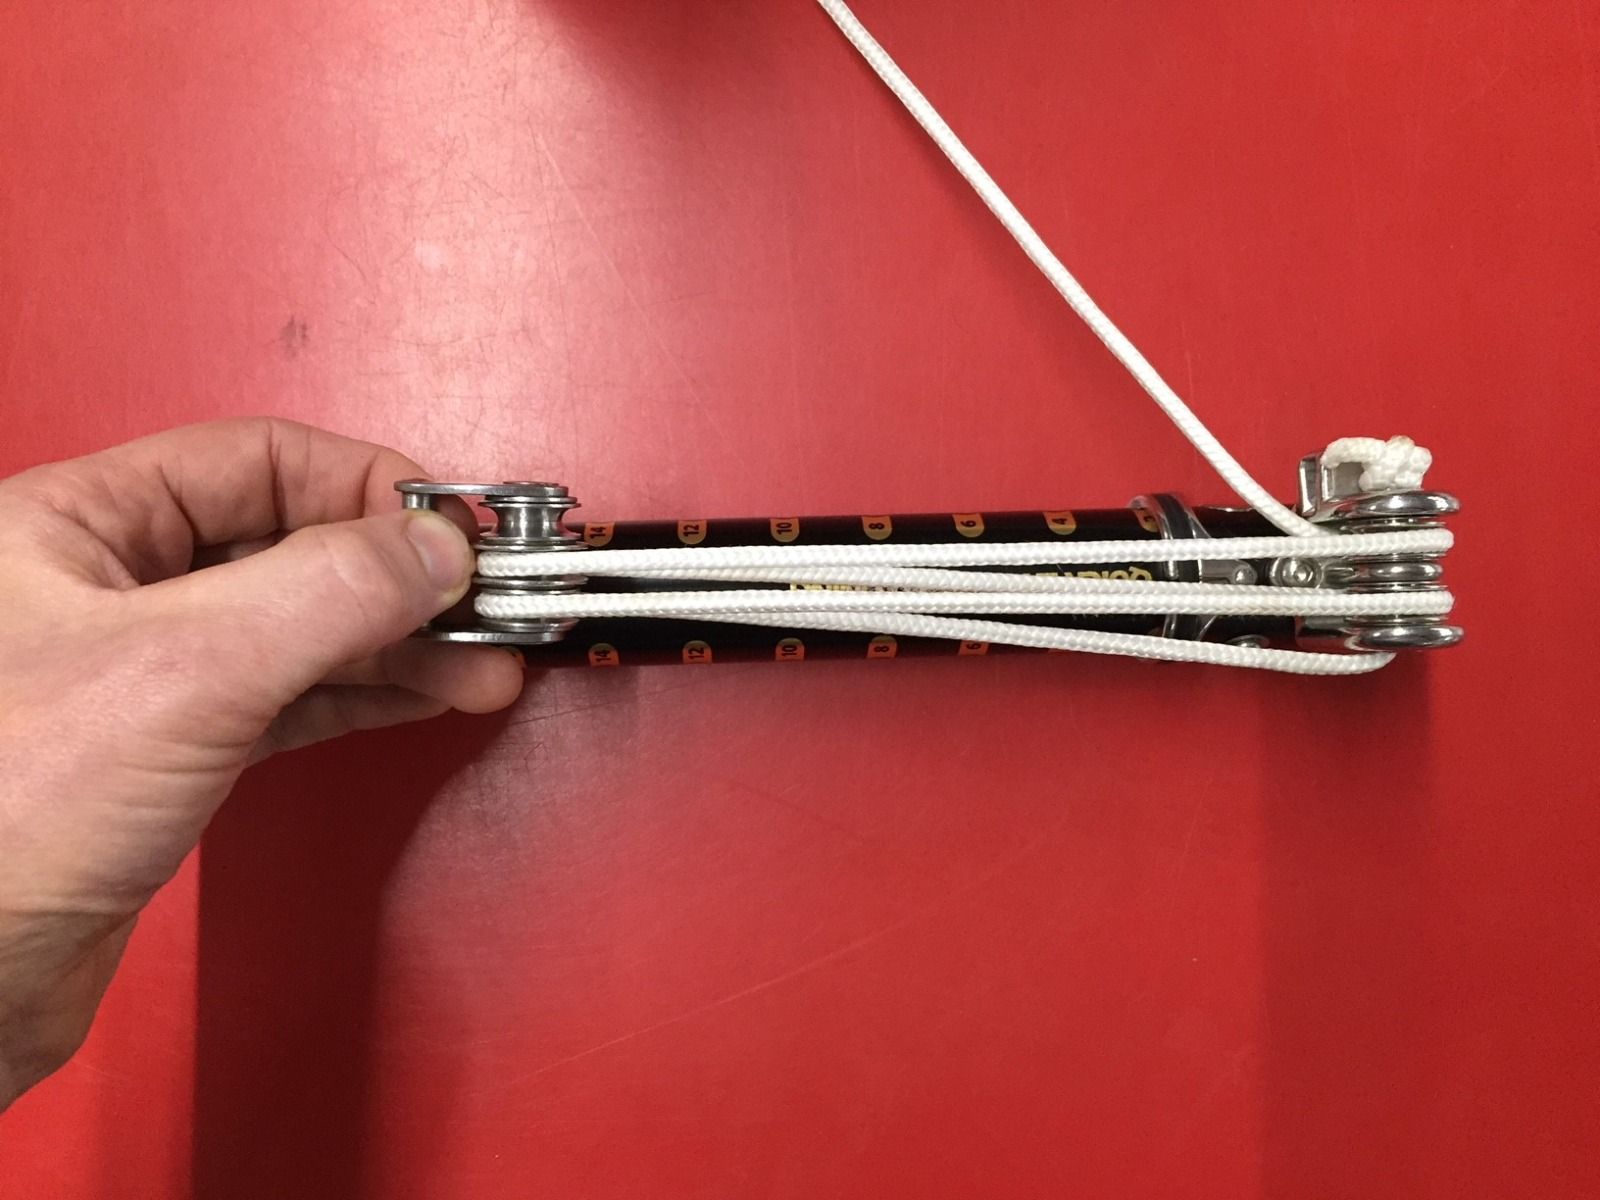
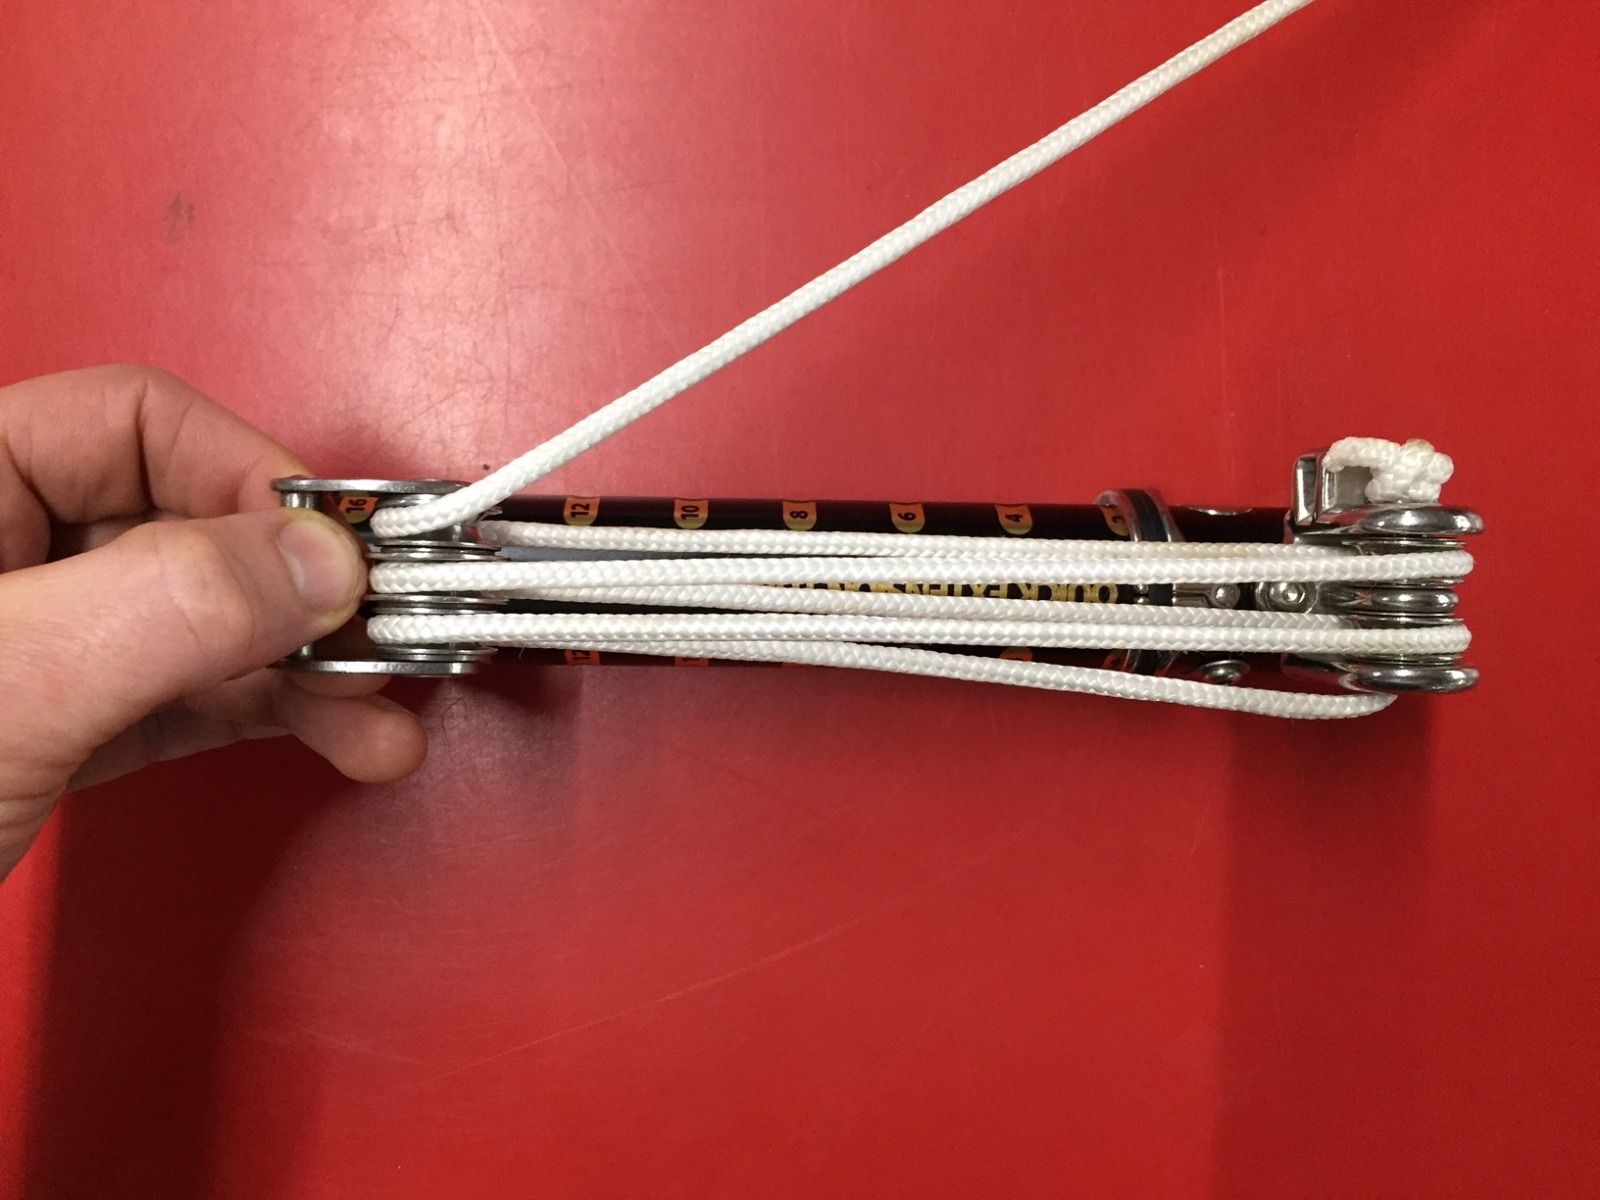
Stage 4 - threading the downhaul rope
Once inside the mast it is time to thread your downhaul rope through the pulleys. The downhaul rope attaches the extension and sail. Its role is to tension the sail for optimal performance. One set of pulley is on your extension, the other within the base of the sail. There are many different ways you can thread the rope and ultimately what works for you is correct, there is no right or wrong. The only comment would be that you should avoid the rope crossing itself. Make sure it runs in nice straight lines (Img. F). In doing so it will make downhauling much easier and will also help the sail perform better in terms of rotation and flexibility.
We demonstrate below 2 different ways that work for us.
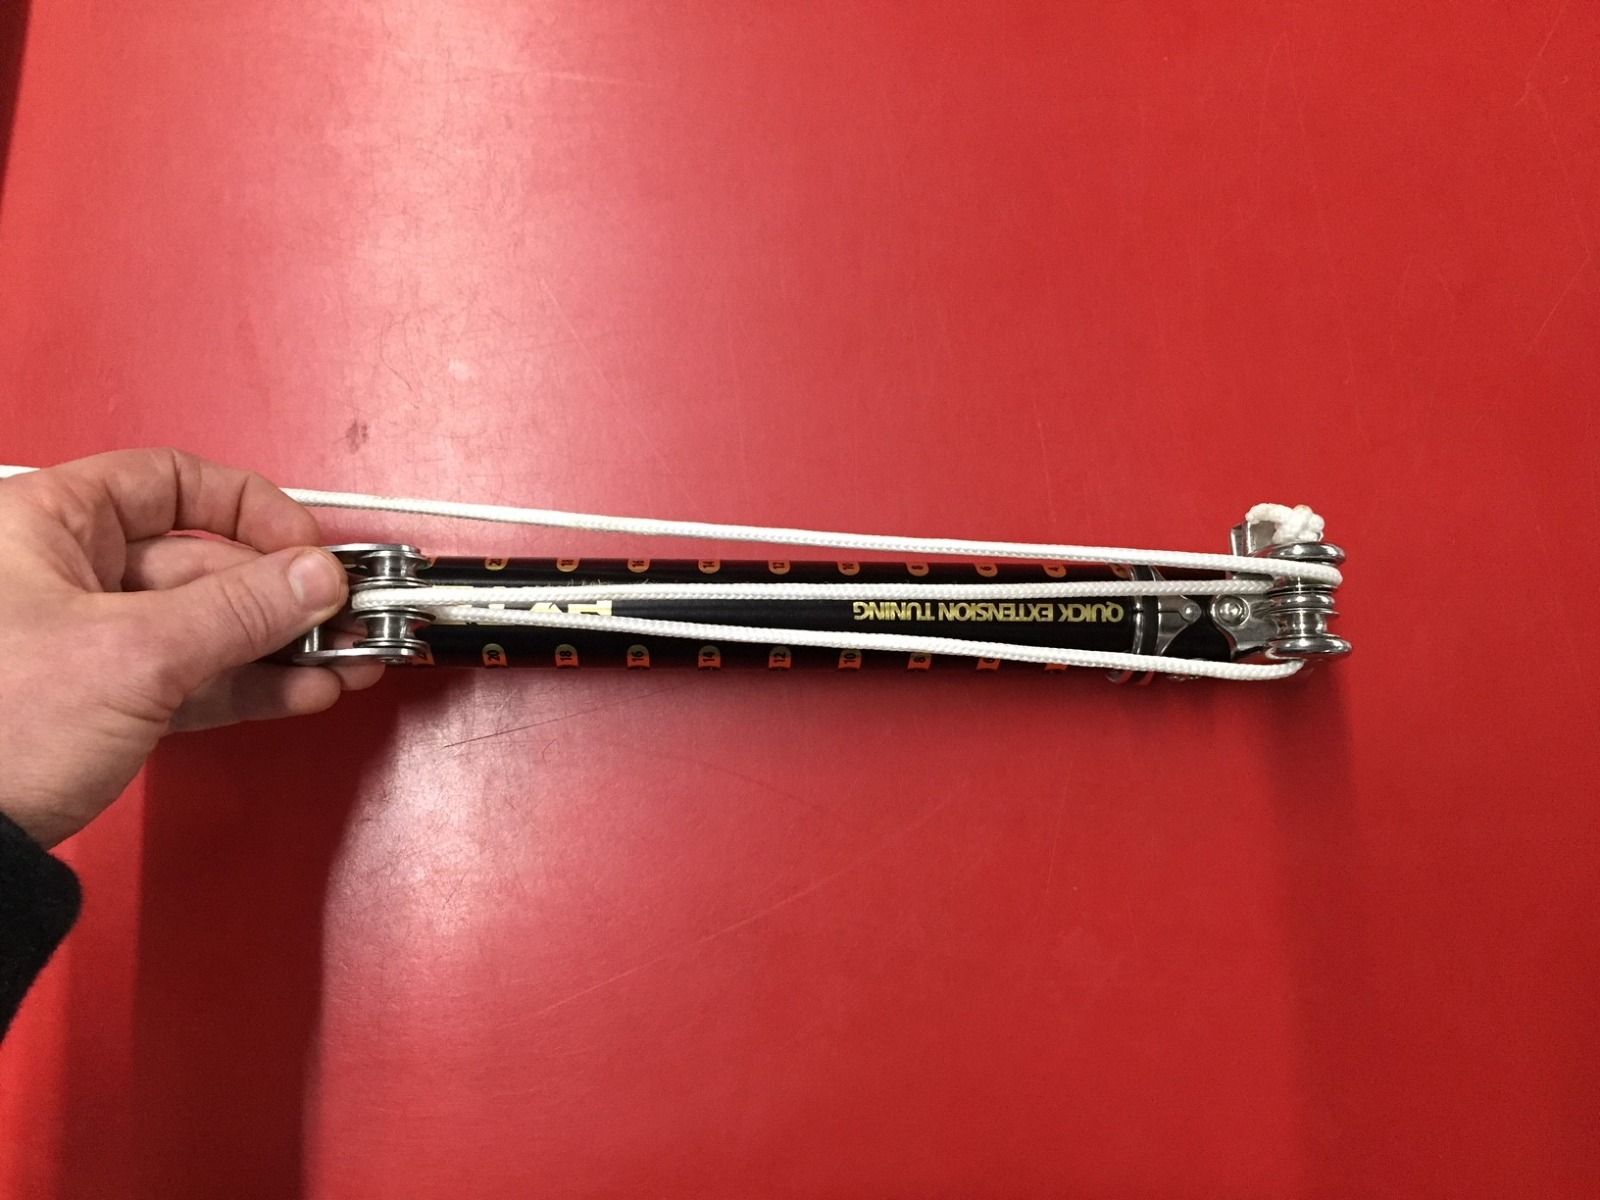
Method A) Our recommended technique but a little intricate. See additional pictures to make this clear:
- From the extension feed up through the central sail pulley
- Feed up through the right hand extension pulley
- Feed down through the left hand sail pulley
- Feed down through the left hand extension pulley
- Feed up through the right hand sail pulley
- Finally, feed the loose end through the cleat on your extension.
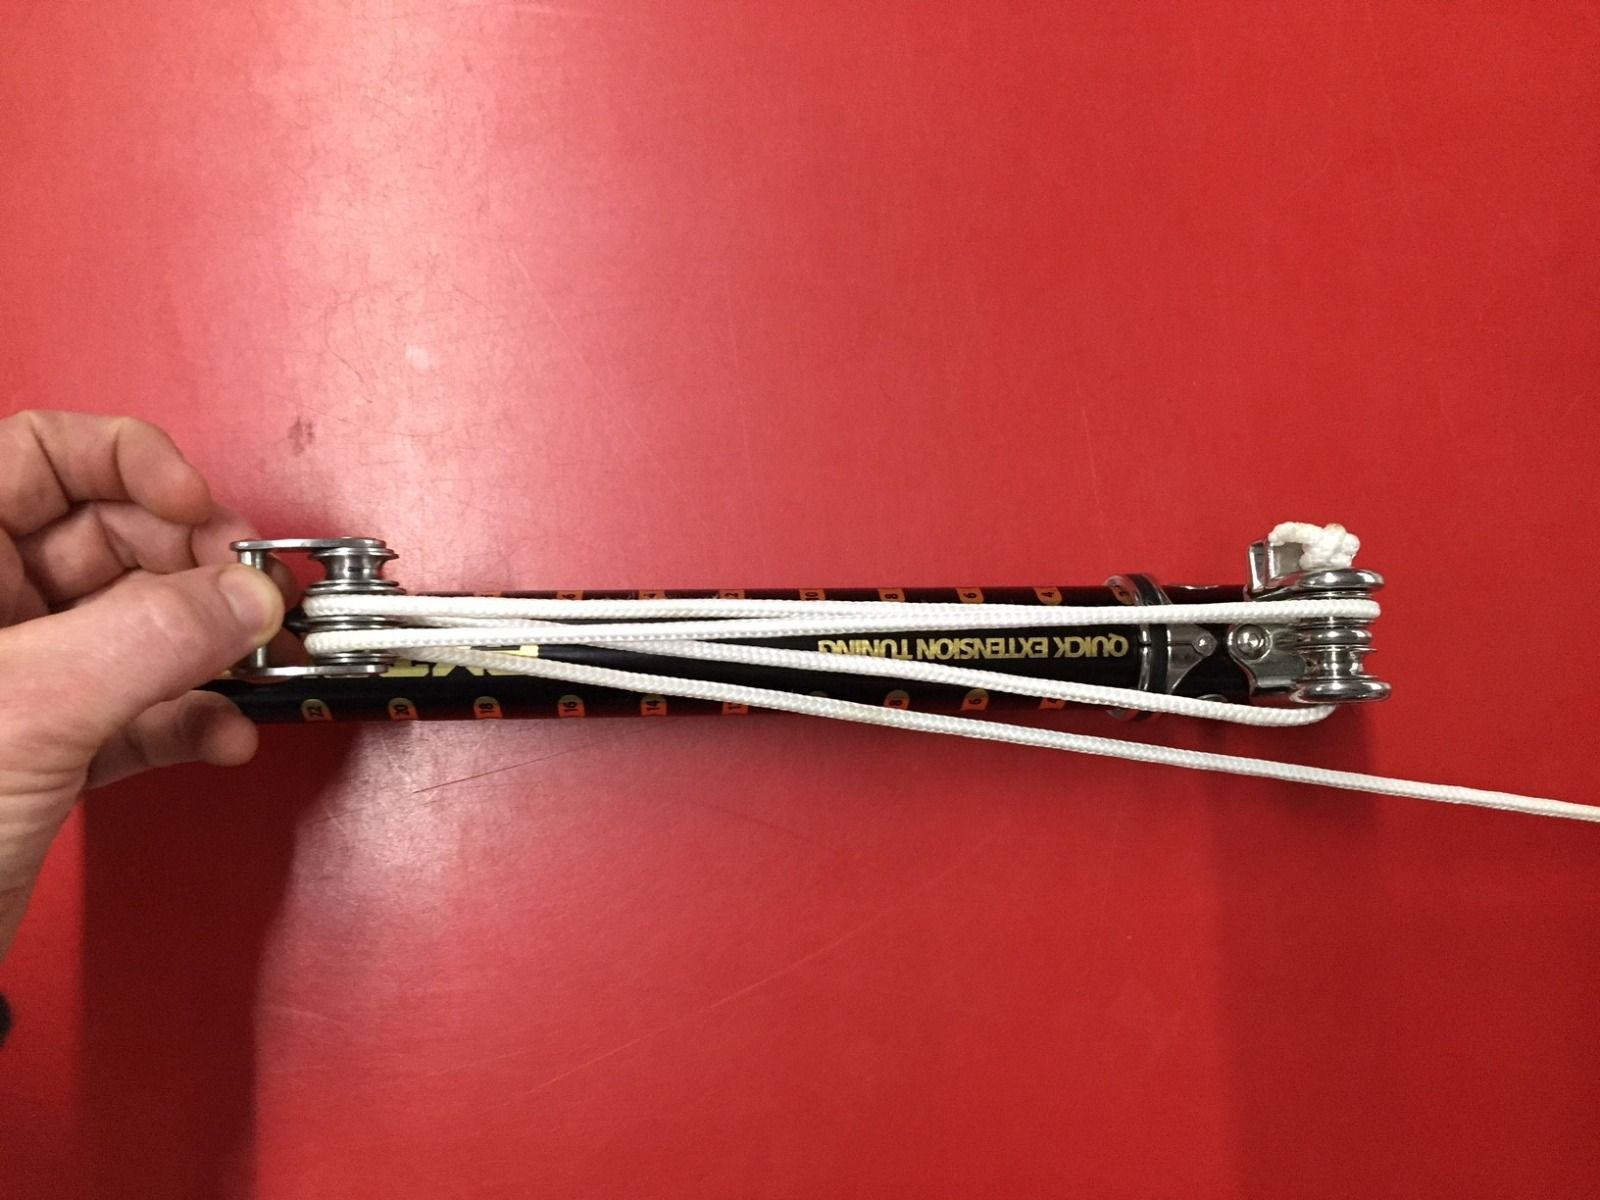
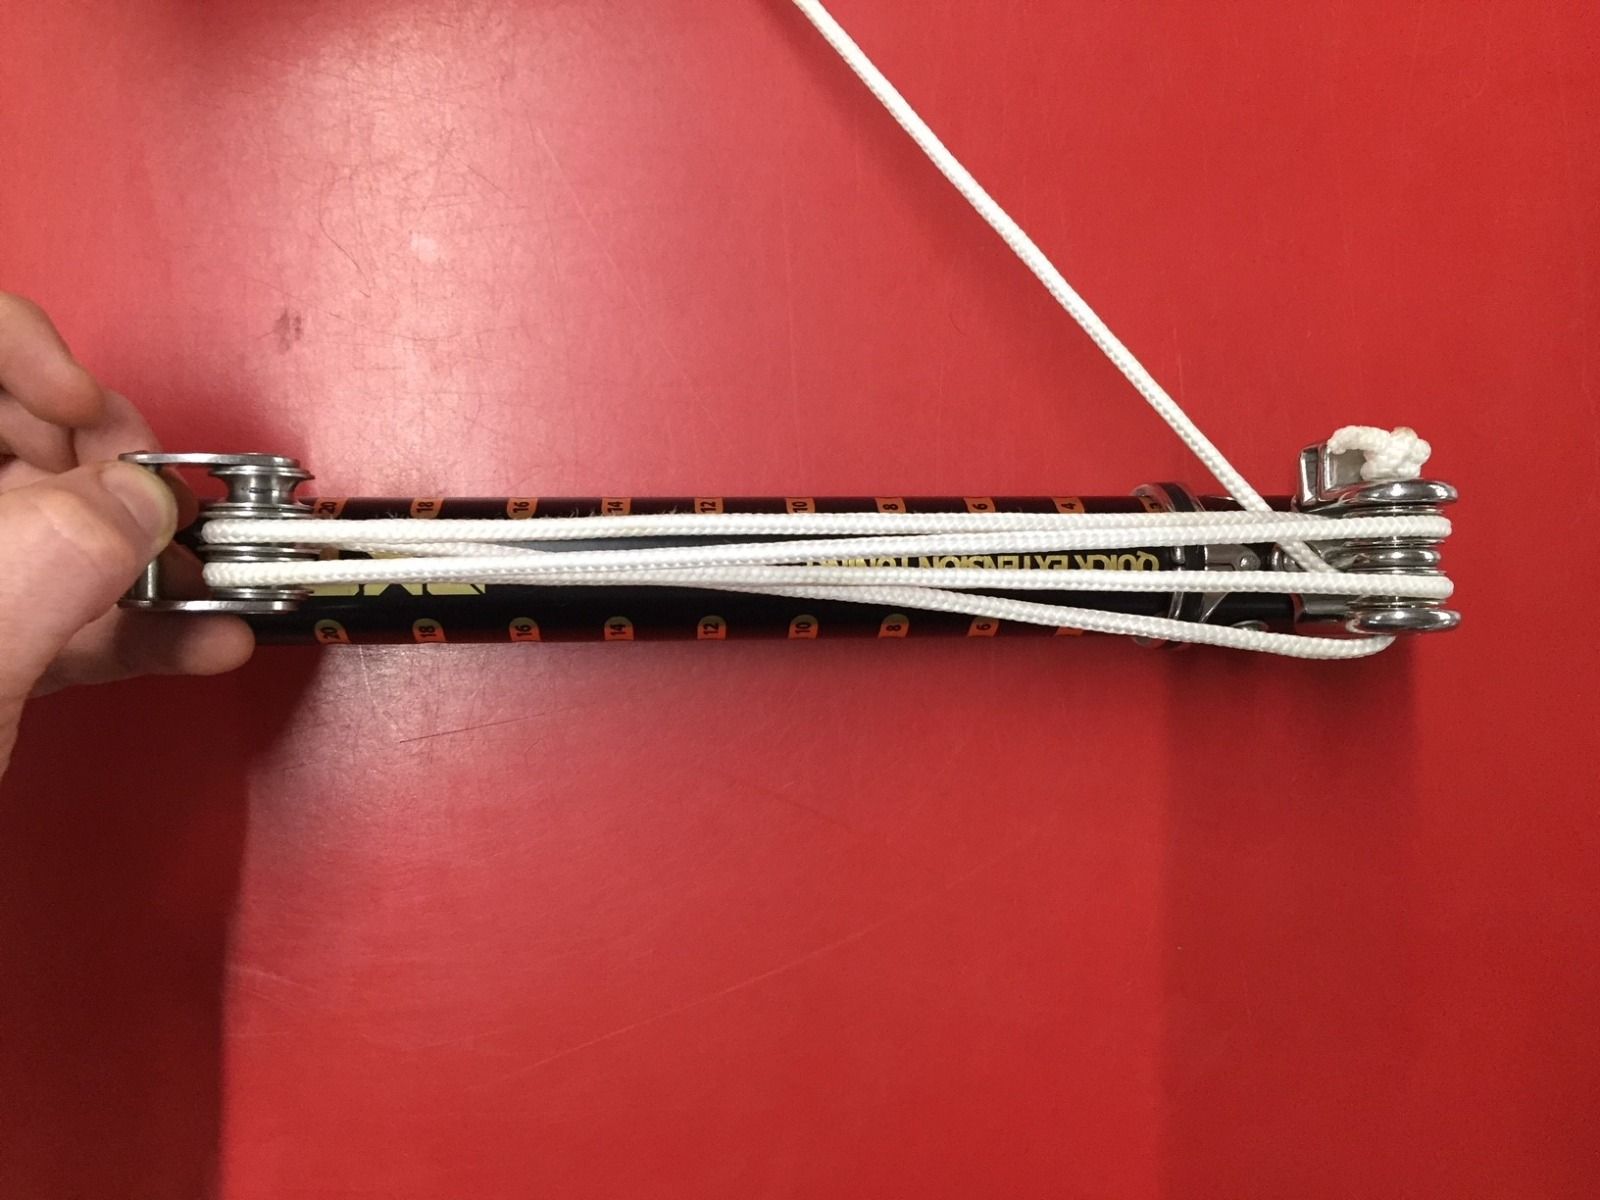

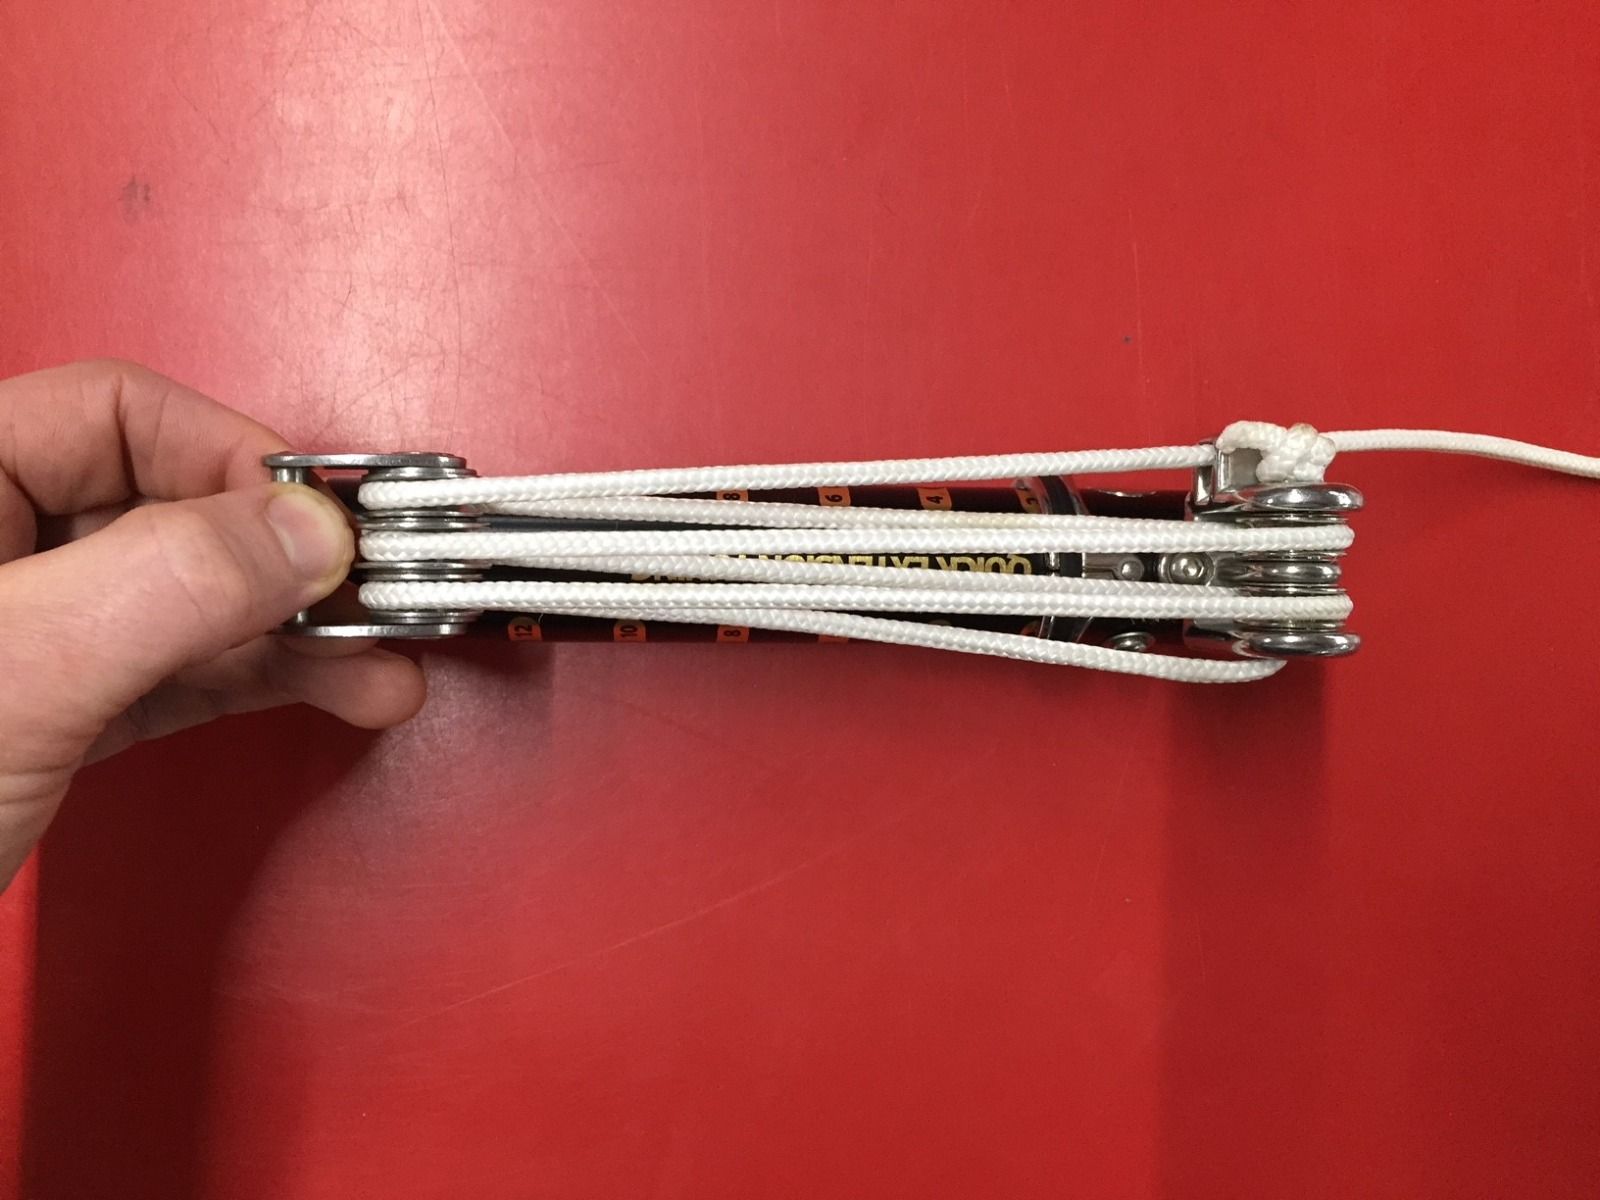
2nd way: A little more straight forward but fails to line up as perfectly.
- From the extension feed up through the left hand sail pulley
- Feed down through the left hand extension pulley
- Feed up through the central sail pulley
- Feed down through the right hand extension pulley
- Feed up through the right hand sail pulley
- Finally, feed the loose end through the cleat on your extension.
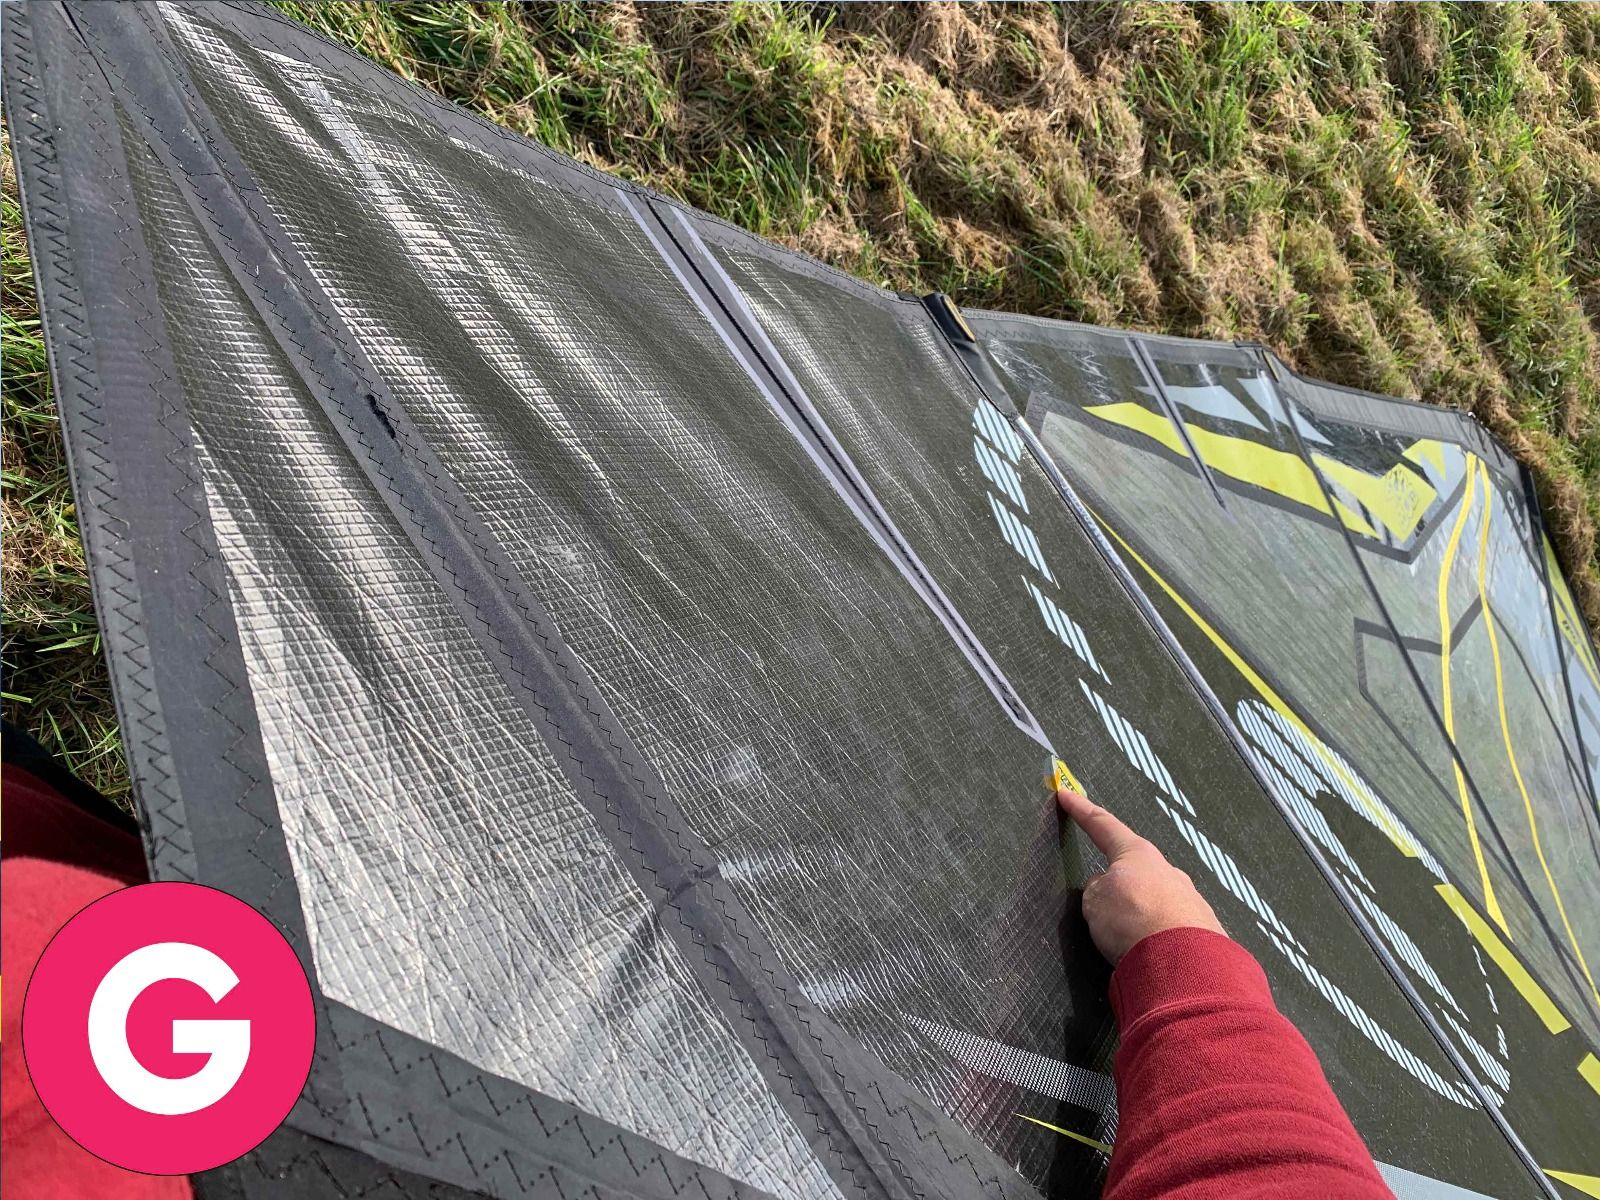
Stage 5 - Downhauling
Once you have threaded the rope through the cleat it is time to downhaul and place tension in your rig, which will in turn flex the mast. Avoid doing this by hand as the tension required is substantial and can cause friction injuries. As such, we recommend using an easy rig tool, although some windsurfers simply use a screwdriver or harness bar.
Most modern sails have a downhaul mark or dot between the leech and the luff (Img. G), which acts as a tension guide. When you start to downhaul you will notice that the leech of the sail will be loose and develop wrinkles, while the section of sail by the luff remains under tension. As you increase the amount of downhaul the wrinkles will move progressively towards the luff. Once they reach the aforementioned reference dot it is time to stop downhauling, you have sufficient tension in the sail. Certain brands may have more than one reference market, namely for lighter or stronger winds. As a general rule for freeride and wave sails the stronger the wind the more downhaul you will require for optimal performance. In contrast, most race and cam sails do need a specific downhaul in all conditions and the bigger range of trimming will be on the outhaul.
Once you are happy with the downhaul tension it is worth checking the space between the bottom of the sail and extension. You do not want this to be too great and we would recommend a maximum of 2 fingers and a minimum of one finger. If the sail is too close to the extension pulleys it will not allow the sail to breathe and rotate as it should, especially in the case of cam sails that require additional rotation space. On the other hand, if the space is larger the sail will sit too high from the board. As a result you will lose control and power, as well as compromising upwind performance. To achieve easy progress into the wind we would ideally like the base of your sail to be as close to the board as possible.
After downhauling you will find an excess rope tail. This is completely normal and to be expected, so simply tidy this around the extension. Most new sails have a little pocket where you can stow the spare rope. It is important to follow this advice as if left loose it will be irritating and potentially dangerous.
Stage 6 - Attaching the boom
Now it’s time to attach the boom. Firstly, ensure the numbers and letters are pointing the right way so you don’t put the boom up-side down. This is a common mistake and nothing to be embarrassed about. Open the tail of the boom to a greater extent than you will actually need so it pass over the sail with ease.
The boom height in your luff opening is determined by many aspects. In low wind conditions you tend to have the boom higher as this helps with early planning and improved lift. In contrast, for higher winds the boom needs to be lower to increase control. Like with downhaul amount, the boom height also varies by discipline. For instance, formula or slalom riders tend to have the boom higher, while for wave sailing we tend to have it low. In all disciplines the conditions will also play a part and learning what suits you is all part of the beauty of windsurfing.
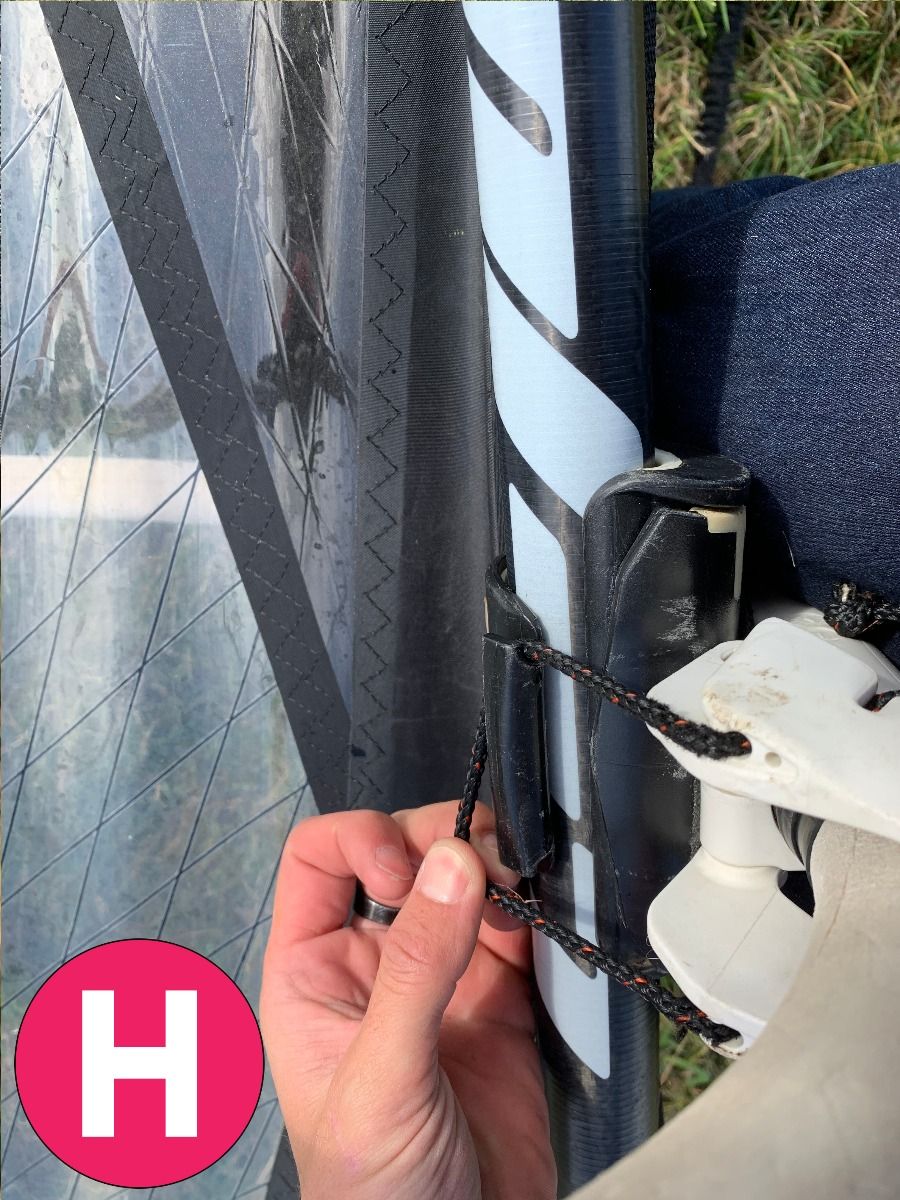
Now we will attach it to the mast, which involves seating with boom onto the mast at the luff opening, remembering to keep the boom clamp lever open. A rope loop is then passed behind the mast before securing onto a complementary hook (Img. H). Once connected you will see that tension is applied when the boom lever is closed. You need to make sure the boom is tight around the mast and it does not have any movement. If there is movement you will find that the boom will slide up and down when uphauling, reducing the feeling of stability. To tighten the boom you would need to open the boom lever before adjusting the rope loop, then reattach to the mast and check the movement is eliminated.
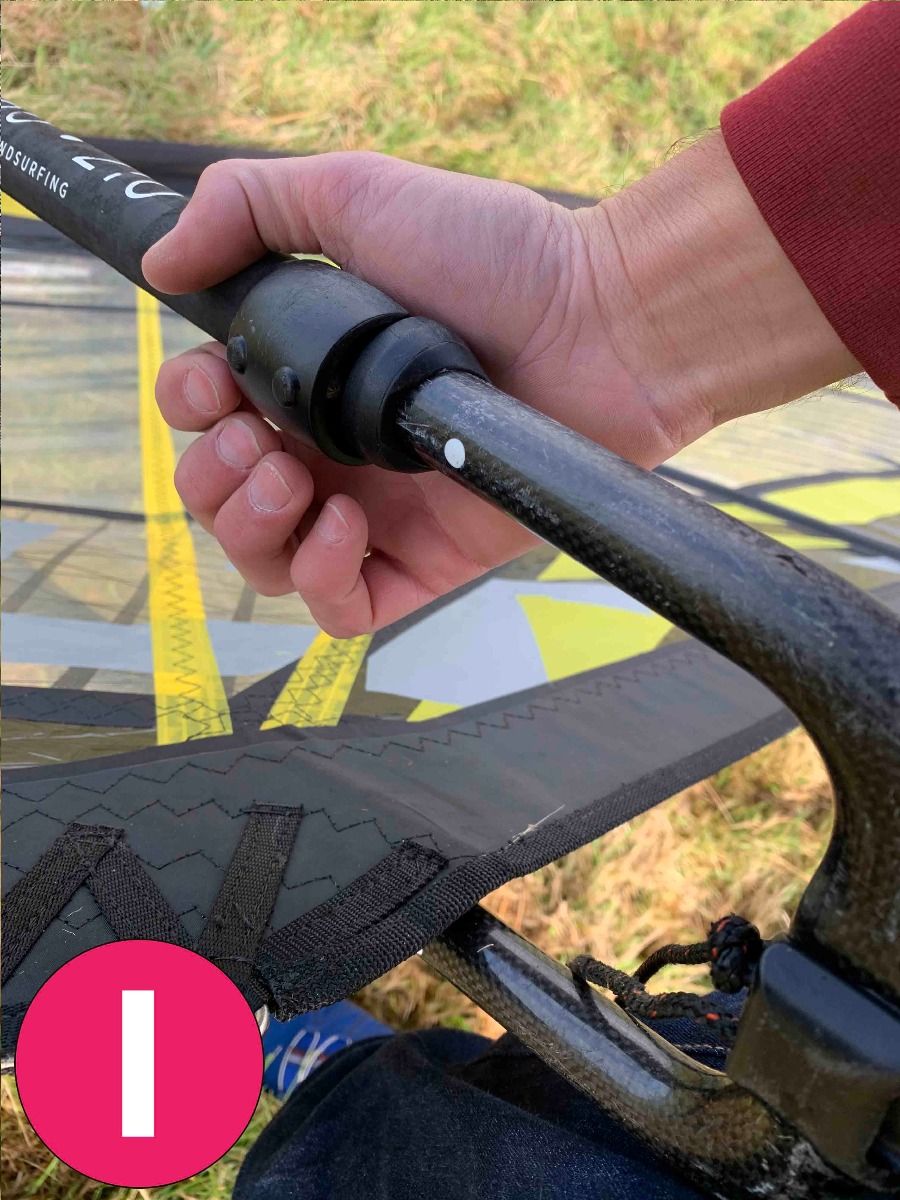
The tail of the boom should then be adjusted to the settings outlined in the brand’s specification (Img. I). Be aware that using a different brand of boom may result to slightly different adjustments.
Stage 7 - Outhaul
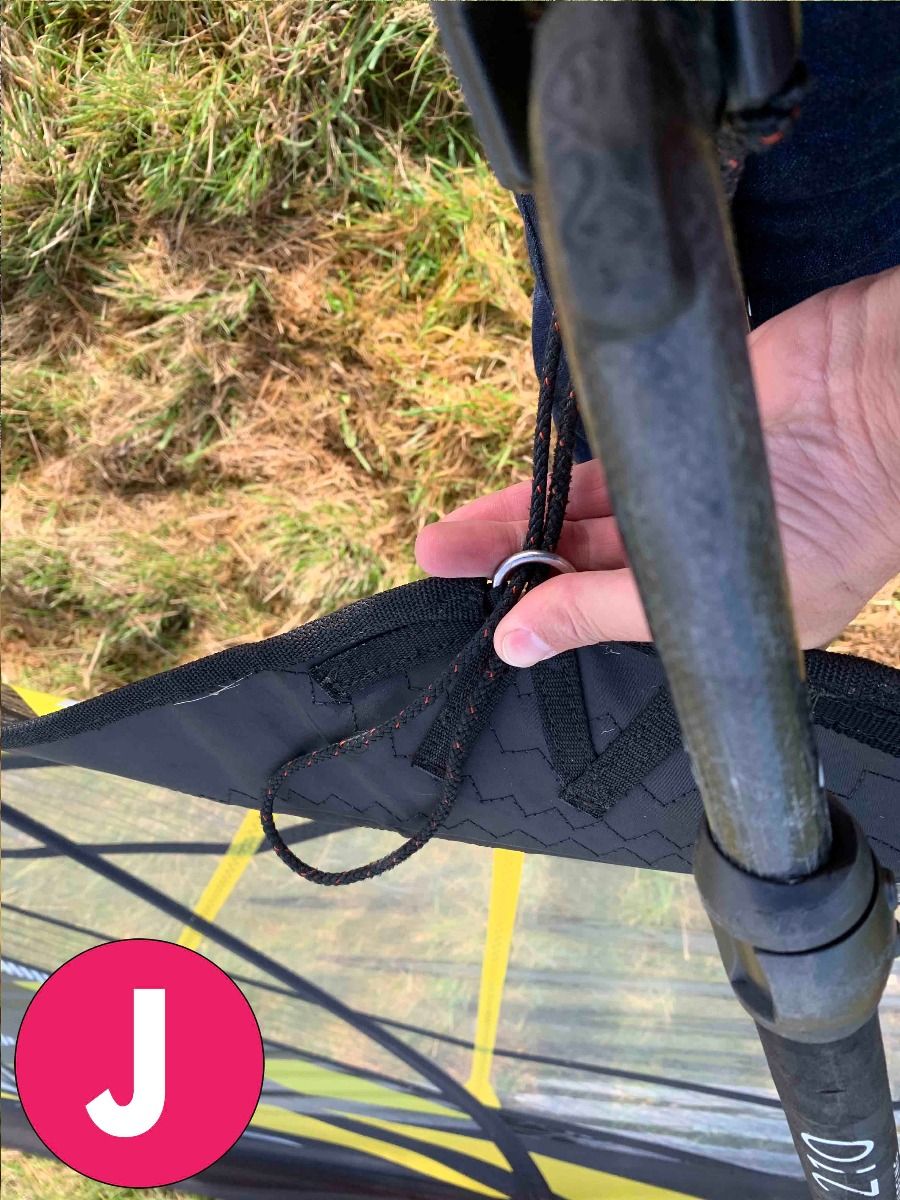
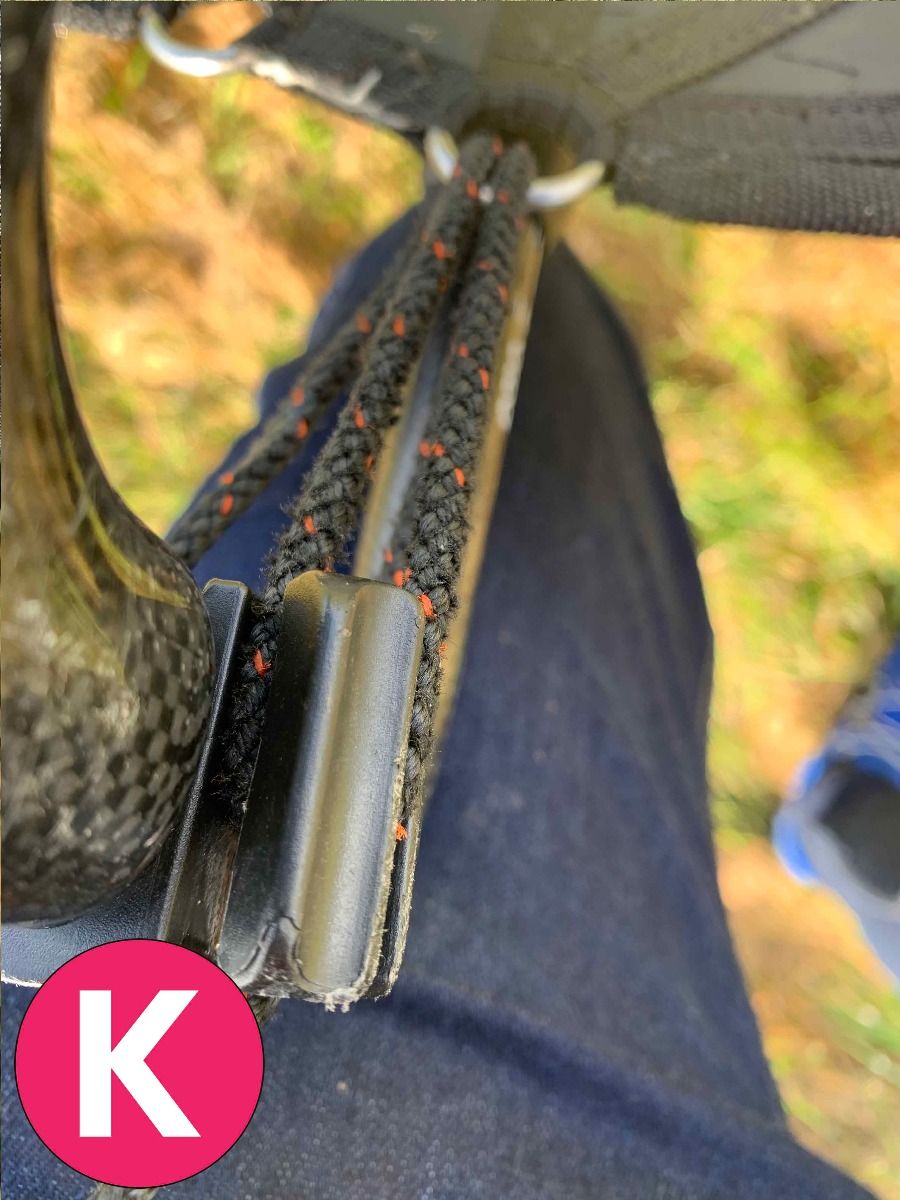
The next step is to outhaul, which involves tensioning the tail end of the boom and sail clew. Some outhaul systems have the rope prefixed in a loop, with one side of the rope passing through the cleat and the other from the hole above. That makes setting up very easy and fast. The only thing you need to do is pass the loop through the clew hole and fasten it around the clip (Img. J, K). Then you adjust by pulling the rope that is threaded through the cleat. Some sails have 2 clew holes and some have one. Usually, we tend to use the upper hole for the lighter winds and the bottom for the stronger winds. But yet again it’s also a matter of personal preference.
When tension is applied it is time to tidy up the spare rope, which should be wrapped around and knotted to ensure it cannot come loose.
How much tension you need to have on the outhaul again depends on the conditions. An approximate rule is that when correctly adjusted you will be able to push the sail to touch the boom arm one third of the way from the tail. Further toward the luff the sail will be too tight to touch the boom arm when pressure is applied. Once you have found the correct tension make sure there isn’t a large gap between the sail clew and the boom tail. Having a big distance will result in the boom being unstable and thus your rig tiring to control. In contrast, the sail clew touching the boom tail or being too close to it will make it harder for the sail to rotate and breathe, especially if the sail has a big profile and/or cams. In either of these scenarios, you should release outhaul tension and adjust the boom length before outhauling once again.
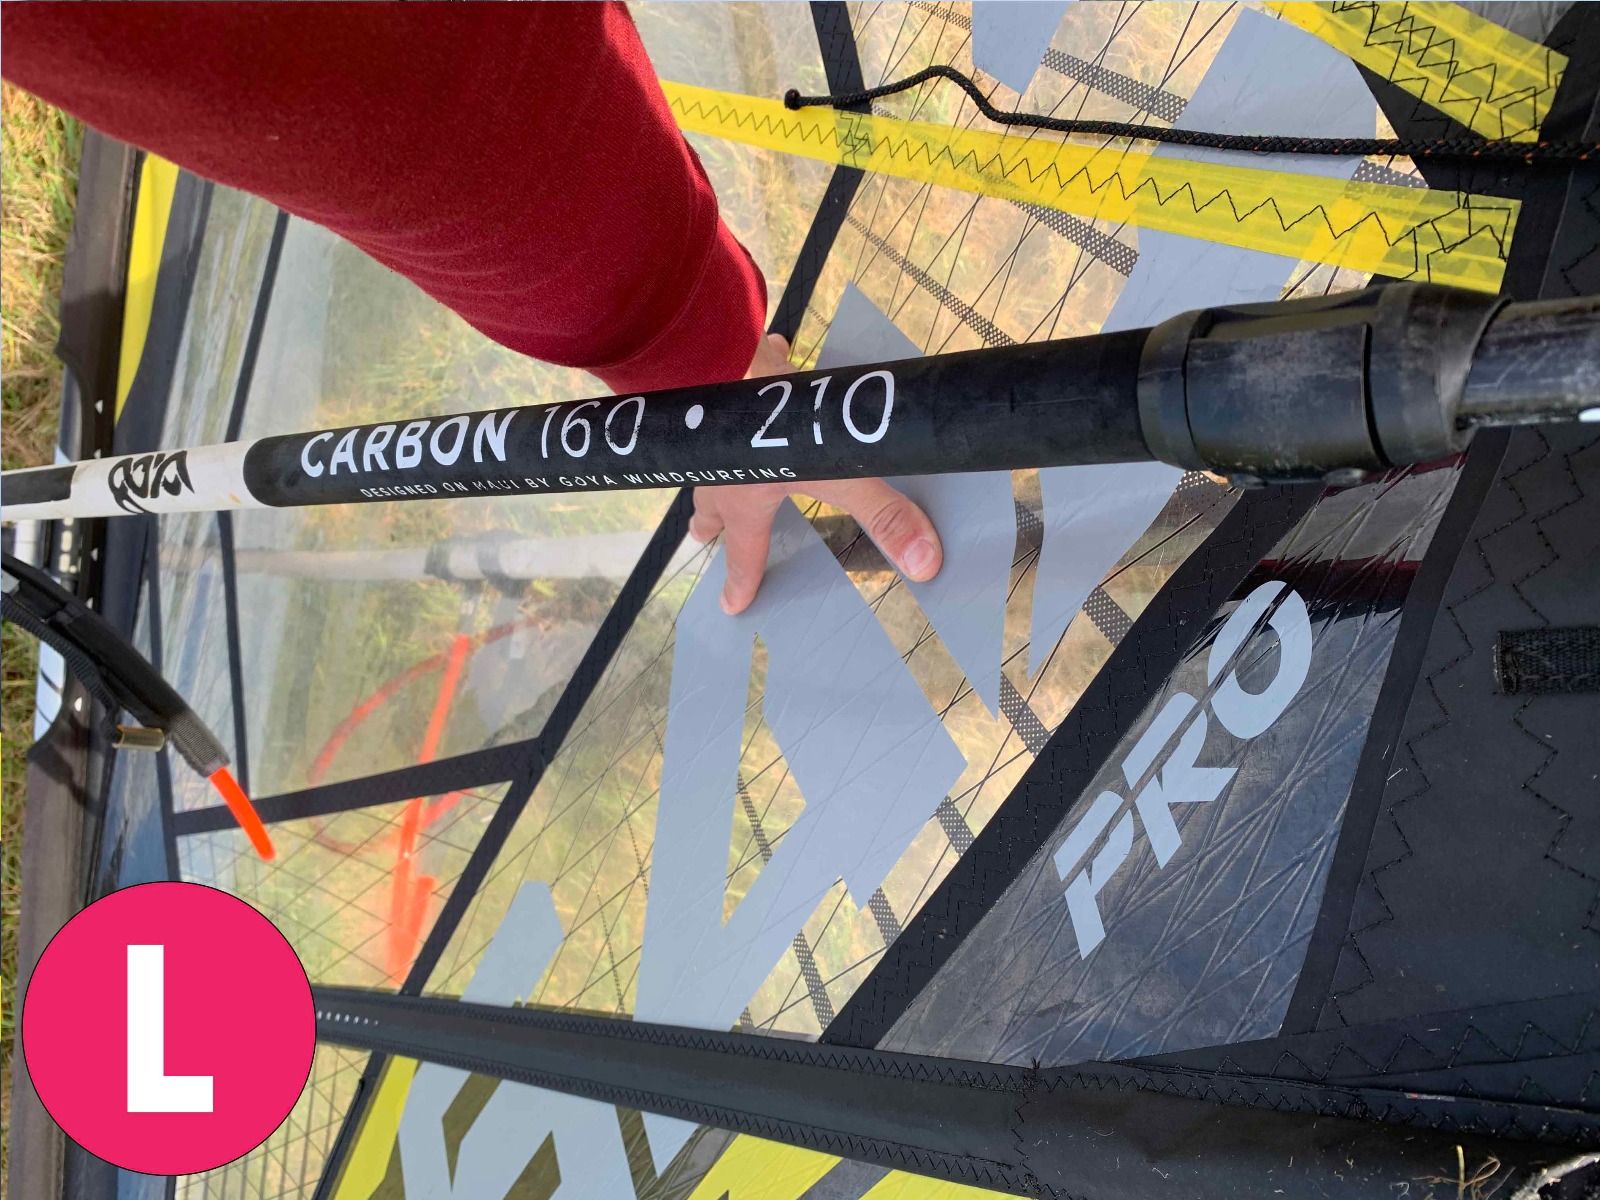
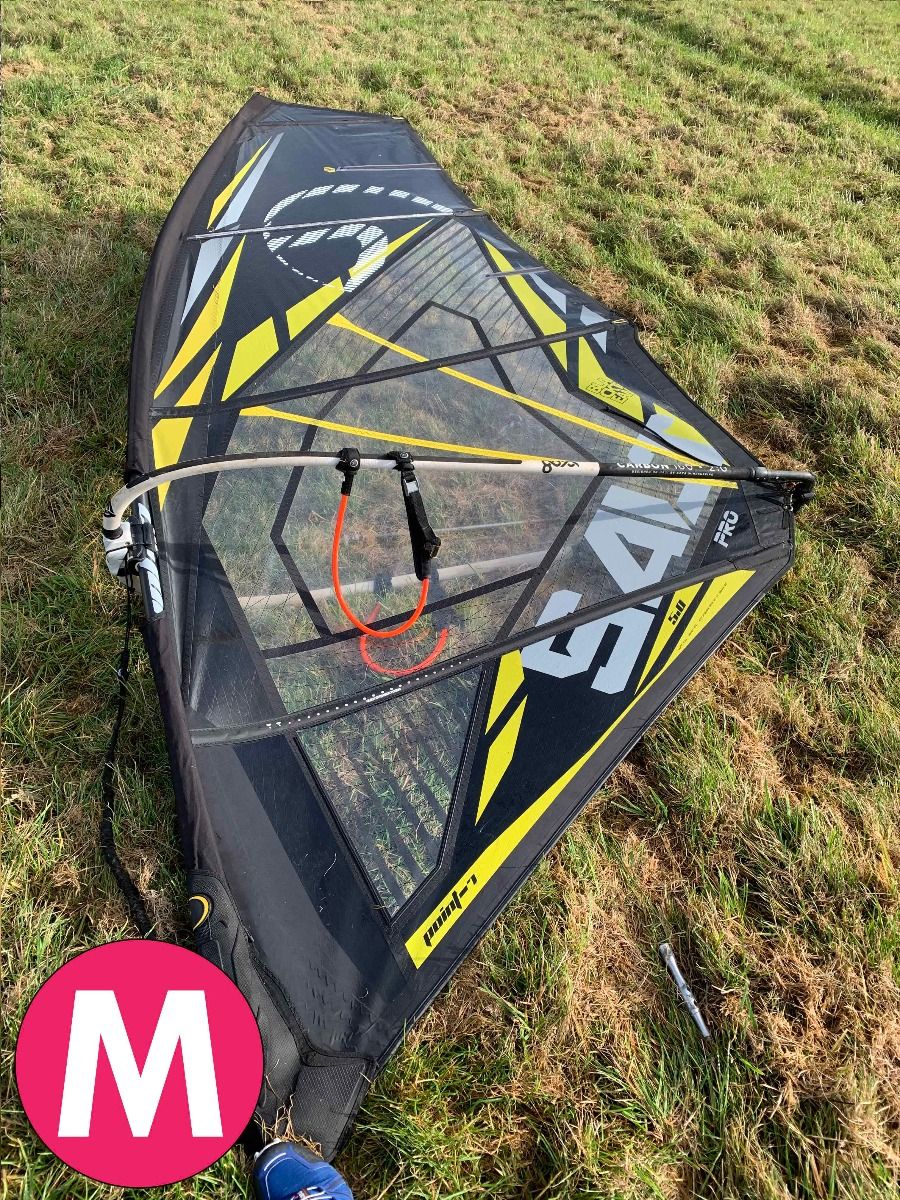
With most sails we would like the main panel to touch the opposing boom arm when pressure is applied (Img. L). Too much outhaul tension would make this impossible and result in a sail that is very unstable and with no power. In this scenario think of the sail as a rigid sheet in which the wind will simply be deflected. In contrast, we would like the sail to catch the wind and translate it into power. The opposing issue is insufficient downhaul, leaving the sail very loose. Again this would feel unstable while on the water but now result in too much power. Sometimes a little less outhaul can be preferable as it increases power but be aware this also affects the location of pull. You will notice a looser sail will have a stronger pull on your front hand (Img. M).
Conclusion - Time to hit the water!
Trimming a sail properly is made up of these basic steps but to be able to rig a sail at its best is a skill of its own and something you will enjoy working on. Always ask for advice on this, or even better pop into the store for rigging tuition so as to ensure optimal performance from your equipment.
